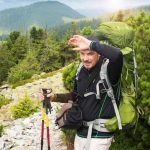

The hiking trails are unforgiving. These aren’t the places where you can afford to make mistakes or come upon them unequipped.
Many things can happen unexpectedly to even the most seasoned of hikers. From a sudden change in weather condition, an encounter with unfriendly wildlife, or getting lost, you never know what the trail’s going to throw at you. That is why it is crucial for you to be prepared.
And for all the new hikers out there, this guide is going to be your introduction to surviving.
This isn’t a full-length survival guide, mind you. For more in-depth information about group hiking, you will have to do more research on your own but our article on group hiking tips is a great place to start.
In this guide, we’ll cover the absolute basics that you need to know in order to keep yourself safe only.
Prevention Is Better Than Surviving
When you need to bust out your survival skills, you’re already in trouble.
Ideally, you should never have to make use of them while you’re hiking. This can be done by doing prevention and safety checks prior to setting out.
Route Research
Getting lost in the wild is a frightening experience that you won’t ever want to experience. That is why it is so important that you research the route before embarking.
Maps
Even when you have never been there before, read maps and terrain layouts on your computer. Acquaint yourself with notable landmarks on the trail to avoid disorientation. This information can easily be found on mapping sites as well as hiking-related forums.
After that, print out the maps for the region and store it in your backpack. While you can always check your phone (make sure that the maps on your phone can be read offline), the physical maps are excellent backups in case your phone fails.
Weather Report
Read the weather report carefully before you set out. Know the temperature highs and lows, then learn the weather patterns for the day. This will help you know when to set out, when to turn around, or when to call off the hike altogether if the weather doesn’t cooperate.
Animal Research
If you are hiking in a remote area, research the local wildlife. Focus on the animals that frequent the place that could prove to be a concern. If there are bears, know what kind they are and prepare accordingly (bring along an air horn, for example).
Make sure to check out our article, How to Keep Food Safe From Bears While Backpacking.
Contact Information and Buddies
Next, tell your friends or other adults where you’re going if you’re about to hike solo. Tell them also when you think you’re going to return. Do this, so that if you were to get lost and couldn’t make contact, they would be able to get the words out for a rescue attempt.
And although it is super thrilling to hike alone, don’t do it unless you know what you’re doing. Always have a buddy with you. An extra person can increase your odds of survival dramatically when something unfortunate happens.
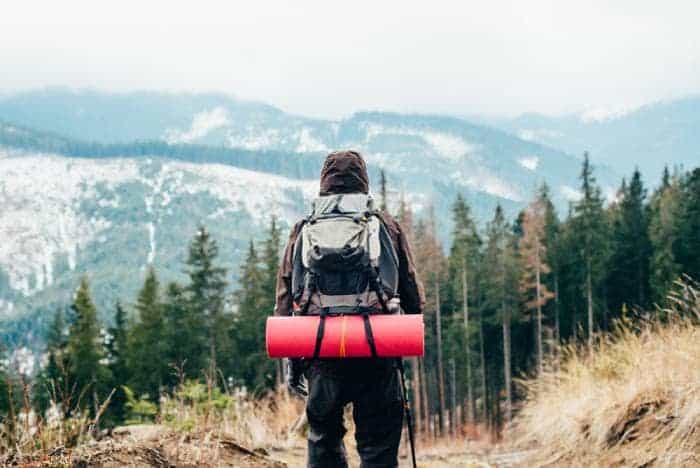
Hydration (And Rations)
Always, bring a good amount of clean water with you. Two or three days prior to the hike, keep yourself hydrated so that you won’t become thirsty quickly on the road. Avoid alcohol, tea, or coffee before taking the hike since they can make you dehydrated quickly.
If you’re planning to camp overnight, we recommend that you bring enough dry ration to sustain yourself for at least an extra 12 hours past the time you expect to finish the hike.
There’s a way of hiking with little to no water source. In our article, Backpacking With No Water Source – Stay Alive Dry Hiking, we share everything you’ll need to know.

Survival Gear
Bring along a knife, paracords, a large rain poncho (or a tarp), a compass, and a fire-starter. You should also have an emergency medical kit on you. If you’re not First Aid-qualified, there are free classes available just about everywhere. Search for a class in your area and sign up. The knowledge will be extremely beneficial.
These are the most basic of survival equipment that you should have on you at all times.
You can supplement them further with water purification tablets, a GPS, a battery bank or the likes if you have the backpack space to spare.
I put together a guide on Emergency Backpacking Shelters. It’s better to have it and not need it than need it and not have it.
S.T.O.P — A Mantra to Remember
When SHTF on your hike, remember to S.T.O.P.
- Stop: When you get lost or something bad happens, stop and think. Do not move further or act without thinking about your next steps. Sit down and compose yourself. Check your safety and your gears, then drink a gulp of water to refresh your head. Fight the urge to instinctively react, as it may worsen your situation than help.
- Think: After you have stopped, think. Lost? Pull out your phone or your maps. See where you are. Recon the area for any familiar landmark and use it to determine your approximate location. Look back behind you and see when and where you have deviated off course. Ask yourself if it’s possible to retrace your steps and get back to where you were (footprints in the mud or snow?). But don’t do anything yet. Now is the time to think.
- Observe: Assess your surroundings and environment. Take note of not just the terrains, but also the weather. If it’s about to rain or it’s about to get dark, you may have to consider settling down. Check your surroundings to see where the best place to camp is. Where natural resources that you can tap are (a brook or a river, for example). If you don’t have camping equipment with you, find somewhere you can shelter. Underneath an overhang, for example.
- Plan: Now that you got all of the information you need, plan. Use the safest option that is available to you. If you think you can trace your steps back to the trail and there’s still plenty of daylight, do. However, if it’s getting dark and you can’t determine where you are or how to get back, settle down. You can try again in the morning when it’s safer to travel.
The most important thing is to keep yourself calm and cool. Panic doesn’t help and will only worsen the situation.
How to Build a Shelter: The Ultimate Guide
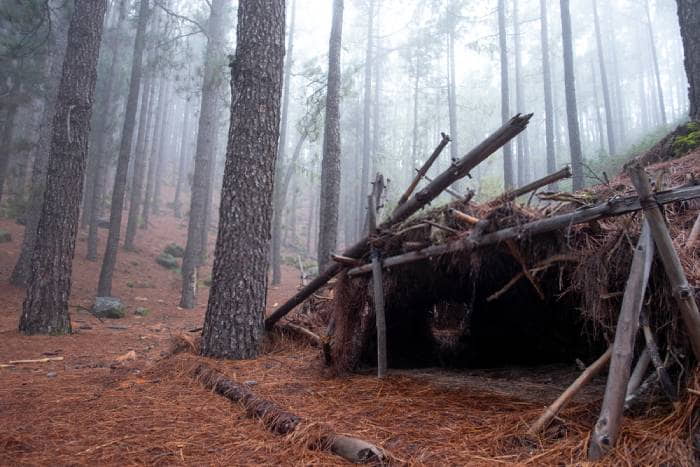
With a few feet of paracord and a large poncho or a tarp and you can make yourself a basic lean-to. We highly recommend you practice doing this in your backyard. You don’t want to do all this for the first time while you’re in an emergency.
Step 1: Scout the Area
Find a good place to make camp, first. It should have plenty of access to water or wood. Additionally, scout the site for potential dangers such as falling branches, winds, or animals.
A lean-to shelter isn’t very strong and can be quickly destroyed by rough winds. As a result, find a suitable place so that your shelter will be against the wind. Wet your finger or hand and hold it to the wind and see which way it’s blowing.
Step 2: Find the Trees
Since your lean-to is supported by trees, find a pair that can do the job. They should be no more than 4 feet apart from one another.
The two trees will support a ridgeline to hold your tarp upright.
In case you cannot find any suitable tree for the job, you can erect two large branches. They aren’t as strong, but they will do the trick.
Step 3: Tie the Ridge Line and Hang the Tarp
Cut out a big length of paracord and tie it around the trunks of the two trees. Tie it as high as you want your shelter to be.
After that, hang the tarp over the ridgeline. Center the middle of the tarp over the line. This will leave two equal halves of the tarp hanging over the sides.
Step 4: Secure the Tarp
All that’s left to do is to tie down the tarp. You will need four tent stakes in total to secure the four corners of the tarp.
If you don’t have prefab stakes, you may collect tree branches and cut them into stakes with your knife. Tie a length of paracord to one corner of the tarp, then tie the other end around the stake. Drive the stake to the ground.
Repeat with the other four corners and you got a bivouac for the night!
An A-frame shelter is rather basic and isn’t very strong, but it can keep you safe and warm at night. There are many other kinds of shelters that you can learn how to build. They are more difficult but offer better protection against the elements.
We recommend that you learn to build them, too. It’s better to know and never need to apply the knowledge than need it but don’t know-how.
How to Purify Water in the Wilderness
For short-term emergencies (like having to unexpectedly spend a night or two in the wild), water is a more pressing concern than food. You can last for up to three weeks without food, but three days without water could be lethal. A hike is a very intensive activity, so you’ll burn through your water supply very quickly.
However, if you have access to water sources in the wild, do not drink immediately. It could be contaminated with all manner of parasites and microorganisms. Getting lost is bad, but getting lost with Giardia (a waterborne parasite that causes terrible diarrhea) is worse.
Boil
Simple and quick. If you have access to a fire and water, boil the water. Wait until bubbles start to roil over the surface, then wait an extra five minutes before taking the water off the fire.
Give the water a few minutes to cool before drinking. If there’s any leftover, refill your water bottles with it.
Boiled brook water may taste quite strange. A lot of people find the taste a little bit off-putting. But don’t worry, the taste is harmless. What’s important is that all the harmful microorganisms in the water are gone.
Water Purification Tablets
Simple to use and inexpensive. This is the reason why we always tell people to keep at least a few tablets in their backpack. It doesn’t take a lot of space and could potentially save your life.
A water purification tablet can be made from a variety of different chemicals. The most popular is iodine. However, you may find tablets with active ingredients being chlorine or potassium permanganate, as well.
Using it is simple. Scoop the water into a bottle and drop the tablet in. It will slowly dissolve in the span of around 20 to 30 minutes, sanitizing the water in the process. After it’s finished, drink right away.
The taste typically isn’t very good. But it’s better than nothing.
Other than water purification tablets, you can also find water purification drops.
Conclusion
Keep all of these survival tips for hiking in mind the next time you go on the road. They may save your life!
Please check out our guide on the Best Small & Large Wood Burning Backpacking Stoves.