
It’s always recommended to hike and camp near water. Sometimes though, this isn’t possible, or the area is going through a drought. The best recommendation for dry camping is when you find a source of water, stock up, drink water, and refill your containers. A good rule of thumb is one gallon, per person each day. Map out where your next source of water is located and understanding the risk of long periods of dry hiking. Let’s look at a few different factors and some tips to help you on the trail.
The recommended amount of water you need per day is around a half gallon. This is under normal activities. Since we’re backpacking this amount is going to increase due to strenuous activities. You will need to look at other factors to help you decide on how much water to carry with you.
Season and temperatures – As it gets hotter, you’ll increase the amount of water that needs to be consumed.
Altitude – You use more water at altitude. The funny thing about this is its easier to get dehydrated because you might not crave water and forget to drink. It’s essential to be mindful of this and remember to drink even if you’re not thirsty.
Prehydrate before you hit the trail– Get a good amount of water in you before you even put your backpack on.
Sun and shade – Sunblock and a hat is a must, even in cold weather. The sun will make you sweat, evaporating the water off your skin.
Sweat less – Slow your pace during the day by hiking harder in the cool morning. If you plan appropriately, you won’t lose much ground by pushing harder when it’s cool. Rest in the shade, use a hat and an umbrella.
How to Stay Hydrated While Hiking
Don’t wait until your thirsty to drink water. It’s recommended to take a sip of water every 20 minutes. Set a timer on your watch if needed. This isn’t hard science but a good rule of thumb. In a perfect scenario, you’ll take your last sip of water 10 minutes before getting to your next water source.
The last 10 minutes will be the hardest and nerve-racking, but this is why it’s so important to plan your stops. Filling up and drinking a lot of water when available and camping for the night near water.
Avoid alcohol a few days before hitting the trail. Alcohol is a diuretic, which means it causes the body to pass more liquid through urination. When drinking hard for a night, it seems like we’re urinating more liquid than we’re taking in, causing dehydration. When planning to go on a dry hike, we don’t need to self-sabotage ourselves the day before.
Hydrate Before You Go Hiking
While avoiding alcohol days before a dry hike, you need to hydrate the day before as well. Make sure you’re taking in water and eat a few healthy meals the day before. I love coffee as much as the next person, but caffeine is a diuretic too. I’ve read a few contradictory studies about caffeine being a diuretic, but it’s best to play it safe given the dangers and extra planning dry hiking takes.
Don’t wait to drink water until you’re thirsty. Be mindful taking in water before the hike and the way going up into the mountains or desert. This is a crucial step in having a safe trip and setting yourself up of success before your boots even hit the trail.
How Much Water Should You Carry While Backpacking?
Water is heavy, it just is, and it sucks you’re going to have to carry more than your use to. A gallon of water weighs 8.3 pounds. So adjust the weight of your pack to accommodate the extra amount of water you’re going to need. Look at some luxury items that aren’t required to shed weight.
I recommend carrying 11.023 pounds or 5 liters of water during dry hiking. If you’re consuming a half liter per hour hiking on a dry ridge, this will give you ten and a half hours of hiking. After that, you’ll need to be at your next water source.
At night you’ll use more water for cooking and cleaning up. In the morning more water is need for breakfast. Ten and a half hours will be a large chunk of your day with enough water. Combining this with hiking harder during the cool morning should keep you safe and hydrated.
How to Carry Water While Backpacking?
Hydration Bladders
There’s a ton of these on the market. When choosing a hiking backpack, I’d recommend buying one with an option to use a hydration bladder. The most common sizes are 1 liter, 1.5 liters, 3 liters all the way up to 3 liters. Some of the things to look for when selecting a bladder are, they taste-free, BPA free, and how easy they are going to be when cleaning the inside of the bag.
The hydration bladder is going to sit inside your pack. A tube for delivering water is going to be secured on one of the shoulder straps sleeves. This will give you access to freshwater while on the move. Some bladders have access to fill from the tube itself, making it more convenient. This is great, so you don’t have to remove the bladder from your backpack.
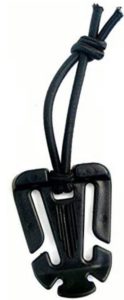
If you’re new to hydration bladders, they are easy to remove, but a pain to get back into the pack when full. Filling fresh filtered water through the tube is a major convince. Use these small tools called Web Dominators to secure the tube to the shoulder strap. This little tool eliminates excess webbing trip/snag hazards. See the current price of the Web Dominators on Amazon here.
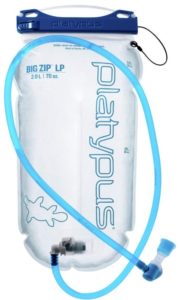
I recommend the Platypus reservoir hydration bladder. This bladder has a quick disconnect with auto-shutoff, so the tube doesn’t have to be removed when refilling the bladder. The top slides off, unlike others with a clumsy screw top. They are affordable, strong and have positive reviews. Check out more of the features and current price of the Platypus hydration bladder on Amazon here.
Cons of Hydration Bladders
It’s hard to tell how much water is left in the bladder. When I first started using a water bladder, I was surprised when I started sucking air. I heard a tip to start counting gulps and slips. You don’t have to be exact keeping the number in your head, but counting sips will give a rough estimate. The learning curve is quick once you’ve used the same size hydration bladder a few times.
Even the tasteless bladders have an off taste for a little while. If you know of one that doesn’t have an off taste, tell me down in the comments. Either way, this goes away after washing the bag a few times.
Water-tube freezing. This can happen in cold water, but it probably won’t be a problem if taking a sip or two every 20 minutes. If it is freezing, a trick for this is blowing air back into the bladder between sips and before setting your backpack down for the night. A nice feature on some bladder is an insulated sleeve over the tube to prevent freezing.
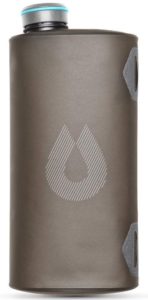
Water Storage Bag
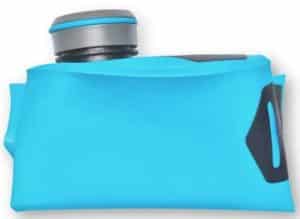
Hydrapak makes a well-made water bag. It folds up when not in use. The smallest one is 2 liters. These are also 100% BPA & PVC free- no weird taste, and no unnecessary or harmful chemicals. See the current price of this Hydrapak on Amazon here.
Cons of hydration storage bags – Your backpack can be uneven from the extra weight on one side. It’s hard to get a perfect balance because the water bag gets lighter as you drink from it. The bag or bottle can be a pain to stop and drink from it. If stopped, I usually take larger gulps to get the most out of each rest period.
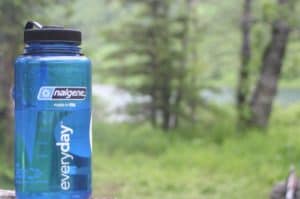
Nalgene Tritan Wide Mouth
Chances you already have one of these. This is one of the most gifted camping and hiking accessories. I’ve had mine for over fifteen years. I use it for everything from keeping water on my side to cooking and eating out of it. If you don’t have one or want to see all the sizes available check out the Nalgene Tritan camping bottle on Amazon here.
How Do You Get Water When Backpacking?
Trial maps and even google maps will show water sources. You can also call local park rangers and find out if there’s still water in the area or it’s dried up. They will give information about the water source and how well it’s still flowing. Ask other hikers where the next water fountain is. People are usually friendly on the trail and happy to help.
Traill guidebooks will show you where the major springs are. Some old trail guides and books show an area of water flowing but be mindful they could be underground now, preventing you from filling up your water containers.
Plan Your Route
I already mentioned to stock up on water when available, but planning when you’ll need water is just as important. A tip is caching water; this is hiding or placing water somewhere on the route before setting off on foot.
Look at the rules for the area you’ll be hiking. Some areas don’t allow this and other regions only allow it for a limited amount of time. Here in California Joshua Tree National Park, you are only allowed to cache food and water for up to 14 days.
Keep a lot of water in your car. This is so you know there is a safety net not too far away. It’s also a strategy to hike in a loop, back to the car. It goes without saying but having a good water filter with a way of boiling water to be extra safe.
What to Look for in a Water Source
The lowest grade of water on the trial is Stagnant Water. This is a breeding ground for bacteria and parasites. Water flowing from a Spring high up near the ridgeline or the top of a mountain will be the best water and have less chance of contamination.

A couple of things to think about is to try and source your water directly from the earth. If there’s water coming from a fountain or tiny stream where it’s being filtered from rocks and earth, it’s probably going to be a good source of water, some of the best you can find.
Another thing to think about when pulling water from a stream is what’s the likelihood of a dead animal being directly above the water source? This thought has crossed my mind hiking in areas with cattle. If it’s at all possible, make the effort of getting water as high up as you can.
If you do have a bad experience with water, your trip is going to go downhill quickly. Having purifying tablets with a good water filter is a good backup plan.
How to Purify and Clean Water When Hiking
There are many different ways of filtering and purifying water, and it depends on the location you’ll be hiking. The simplest and cheapest way is to use purification tablets. These tablets make contaminated water bacteriologically suitable to drink within 35 minutes.
Even if your preferred drinking water is through a filter or boiling water, purification tablets are a must-have to keep in your backpack for emergencies. They are a great way to purify a large quantity of water for a group inside the camp.
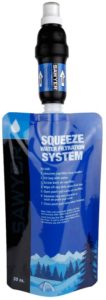
There are many different charcoal filters or UV water purifiers on the market. The one that I recommended is the Sawyer Squeeze Water Filter. This system includes the Sawyer Squeeze Filter, two 32 fl. oz pouches, a cleaning coupling, and additional accessories for gravity and inline use. It also gives you the option to drink water directly from the spout as well. The filter uses a hollow-fibre membrane that removes 99.9% of all bacteria while only weighing 3 ounces. This filter has a very reasonable price, and you can learn more about it on Amazon here.
The reason I don’t like UV water purifiers is that I work in a water treatment facility. We use large industrial UV filters, and I’ve seen them fail under normal working conditions. There have been many times funky stuff is growing downstream of the UV filters. Once again, this is just a personal preference; there are many people that swear by them.
Do Water Filters Remove Viruses?
Generally speaking, no, they don’t. Water filters and water purifiers like the ones mentioned above are made to remove bacteria and protozoa. These filters are more in a class called “backpacking water filters”, and viruses removing filter are “water purifiers”. The terms get used all the time interchangeably, but they are different.
The reason all filters can’t remove viruses is due to the size difference between viruses and bacteria. Viruses are much smaller. UV light or boiling will destroy viruses, but you don’t need to use these in North America. In these areas where fewer humans are, the water sources are cleaner.
If you are travelling in a less developed area with poor condition and lousy sanitation you’ll need a water purifier. This is an entire subject onto its own so check the water guidelines before travelling.
What to drink while hiking
Drinking a lot of water is a given, but what about sports drinks? Bringing bottles and bottles of sports drinks is impractical. There’s a ton of dry powder and tables additives you can carry in your backpack. Nuun makes Electrolyte-Rich sports drink tablets mix in water containers. This will replenish the electrolytes lost in your sweat as you hike.
Clif and many other companies sell energy gels that are popular among hikers, bikers, and runners. Some of these have caffeine in them while also providing 100 calories a pack. I’ve seen these a lot when running marathons. They are just a supplement though, don’t rely on them to get you through the entire hike.
Stay Hydrated After Your Hike Is Finished
We’ve talked about prehydrate and staying hydrated while hiking but what about afterwards? Keep drinking water and taking in calories after your done hiking. Do this even if you don’t feel thirsty, if you do feel thirsty, it’s a sign that you are already dehydrated.
What if You Get Dehydrated While Hiking?
Prevention is critical, but what happens if you or someone become dehydrated on the trail. Look for signs of dehydration. It can cause headaches, lethargy, and constipation. Use your first aid in helping someone by getting them in the shade, cooling them off and drinking more fluids. An item to keep in your first aid pouch is Oral Rehydration Salts. These are also known to help with a hangover, but they are really just a salty powder made to help keep water in you.
Salt powders and tables are not silver bullets. The most import thing is getting rehydrated while in the shade. Stop hiking and take it easy for a while.
I hope this has helped give you more confidence while dry camping and hiking. With these tips, you’ll be able to go and see places most others won’t, or during times that seem of limits for others.