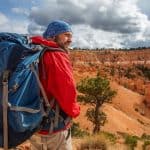
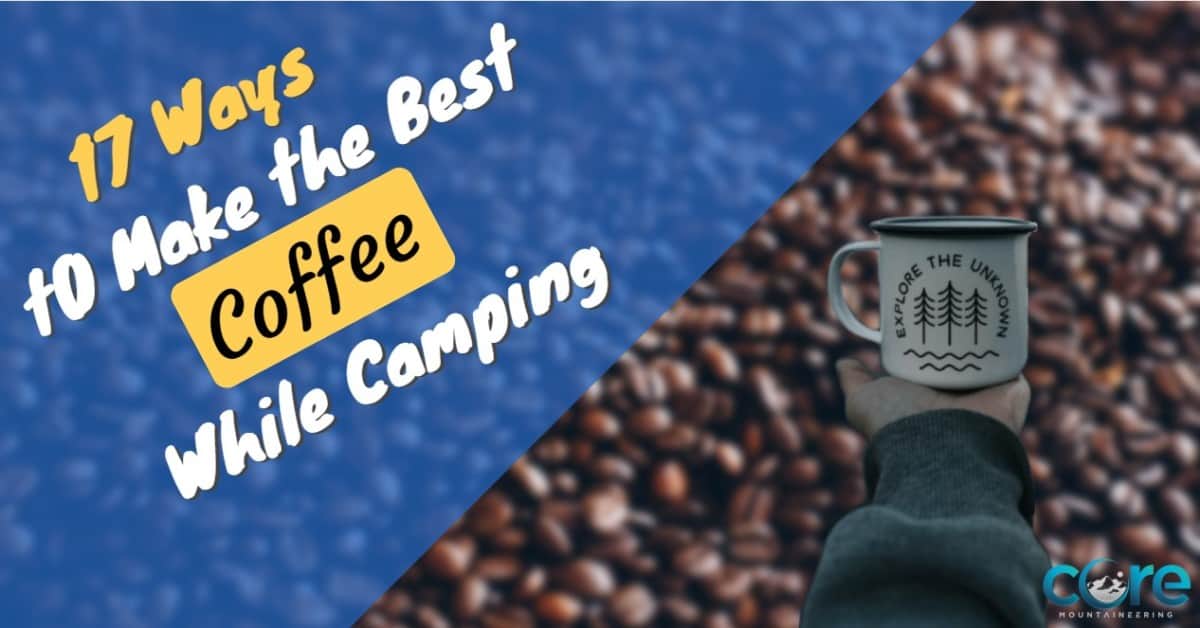
Having your first cup of coffee in the morning while camping is a beautiful thing. Sipping on a cup while overlooking a scenic view is relaxing and one of the best parts of the day. Let’s look at a few methods of how to get the most out of your coffee in the morning. We’ll look at the easiest method, instant coffee to some more time-honored traditions like cowboy coffee.
The Difference Is in the Water
A good cup of coffee is 98.75 percent water and 1.25 percent soluble plant matter. This means that our choice of water plays a major role in the taste and feel of a cup of coffee. I’ve mentioned before that when I set up camp at a lake I fill a large collapsible jug with a few gallons of water.
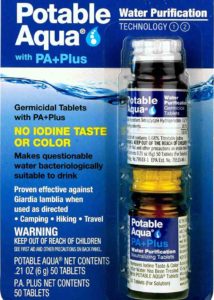
I then use purification tablets to clean the water and set it up on a rock or log for everyone to use. I use the tables because boiling a large amount of water isn’t really an option for me. It takes a long time and I don’t carry a large pot with me when backpacking.
When used correctly purification tablets don’t give off too much of an aftertaste, but there’s still some there. I use this water for hydrating by quickly drinking a few cups and for cleaning. This water should be avoided to use for morning or afternoon coffee though. I prefer filtering clean water from a stream.
The correct temperature of water for coffee is 200 degrees Fahrenheit. This is the sweet spot for dissolving everything we want to dissolve but not dirtying up the flavor of our coffee. At sea level, water boils at 212 degrees Fahrenheit, and lower temperatures as we increase in elevation.
For a reference point at 8,000 feet, water will boil at 198 degrees Fahrenheit. I don’t carry a thermometer with me when hiking but this trick I’ve found works well. When heating up the pot with water, wait until some bubbles form on the bottom of your pot, before it turns into a rolling boil.
This might not be exact, but it will be close to 200 degrees. We don’t want a rolling boil because it’s can be too hot and pouring the boiling water directly onto the coffee grounds will cause them to extract too much too early, leaving the coffee bitter.
Violently bubbling water also agitates the grounds unnecessarily, which will lead to uneven extraction. If you do leave the fire on too long or your stove is hard to control just let the pot cool for 30 seconds after you pull it off the flame.
The Easiest Cup of Coffee
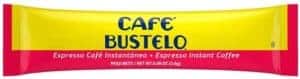
This isn’t the preferred method but it’s by far the easiest and almost the lightest option. There’s a ton of companies that make a single-serve coffee packet now. What’s nice is that these are easy to stuff into a side pocket for quick access, and stirring it into a hot cup of water in less than a minute. If you’re looking for a quick and easy fix this is the way to go.
The Second Easiest Cup of Coffee
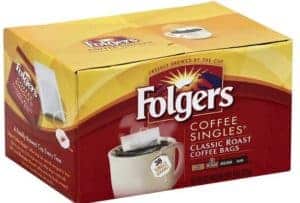
I saw these coffee singles and thought they would be great on the trail. They are almost as convenient as instant coffee because they come in their own individual bags but they taste better.
Overall I think they are a little weak for my liking so I let them steep for longer than the recommended 4 minutes. One downside is that you’ll have a little bit of trash to throw away or burn in your fire.
The Third Easiest Cup of Coffee
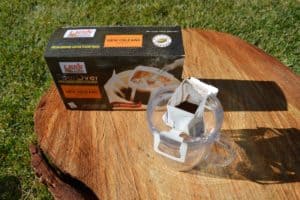
Lee’s coffee pour over fresh ground filter packs. I know there are a few companies making these but this is the first one I recommend. They come as a single-serve pack with coffee inside them that you put over the top of your cup. You’ll slowly pour your hot water on top making a fresh cup of coffee at a time.
There’s no measuring or scooping of grounds so this is an easy method while camping and hiking. You do get stuck with a little bit of trash like the other methods mentioned already and it’s not so great for a group of hikers.
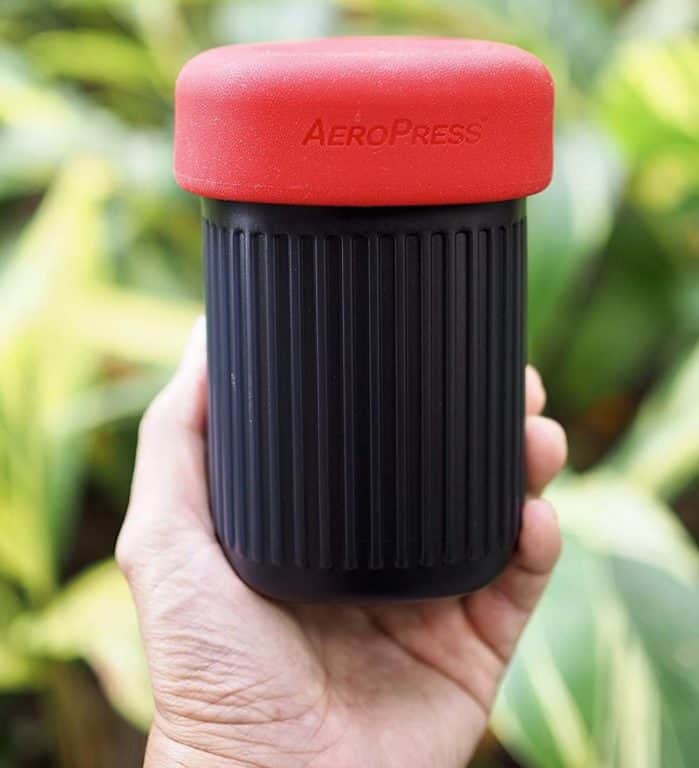
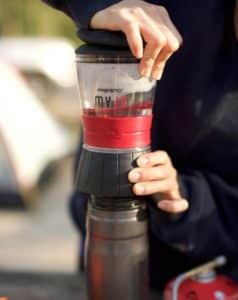
My Preferred Method – AeroPress – 6.4 ounces
Coffee is such a personal thing and if you ask 10 different hikers their favorite way of making it you can get 10 different answers. The AeroPress is going to be a little bit of investment around $30 but it’s well worth it.
I’ve also heard it referred to as a plunger press but I think that sounds nasty. When I make a cup of coffee at home it’s usually with this because of the unique flavor it brings out of coffee.
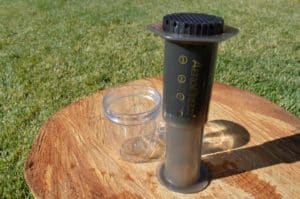
AeroPress Go Portable Travel Coffee Press – 11.4 ounces
This is a smaller variant of the original Aeropress. It features a small size that makes 1-3 cups per press. Also included is a mug and lid that double as a traveling case. If you love the Aeropress then this smaller version is a little better suited for backpacking due to its size and mug. Check availability for the AeroPress Go on Amazon here.
Here are the steps to follow for using the Aeropress and Aeropress Go,
- With our Aeropress upside down insert the top and bottom and put a scoop of fine coffee grounds in before we pour the watering.
- After the grounds, pour your hot water in and fill it to the top.
- Stir the water for a few seconds to break up the fine grounds, then top it off with a little more water.
- With the little filter plate, place the paper filter in and wet it, so it sticks.
- Place the filter cap on top. Wait 4 minutes while it’s upside down (See picture above; this is the upside-down method I found, not the manufacturers’ way)
- Place it over your cup. Press down on the plunger until you hear the hiss of air hitting the grounds.
- Take the Aeropress off the cup and you can discard the coffee grounds.
I like to immediately rinse the Aeropress, it’s really easy to keep clean. It might seem like a lot of steps but after using a few times you’ll fall in love with it. I specifically bought it for camping but as I said, I use it every day now.
Some negative things about this are first the cost is around $30. It also comes with a funnel and a stir stick that I never bring with me because it would be unnecessary weight and not needed. The Aeropress comes with filters but eventually, you’ll need more. The filters are affordable, a large pack of 300 is less than $10.
Another company makes a stainless steel reusable filter disc but I haven’t tried it. Another not so pleasant thing about the Aeropress is it needs to be on a steady level as you’re pressing down because it surprisingly takes more force than I first thought it would. Check the current price of the Aeropress Coffee Maker on Amazon here.
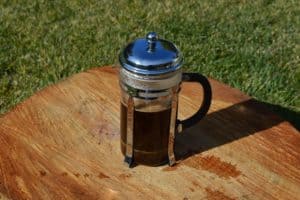
My Second Preferred Method – The French Press – 1.55 pounds (glass)
I love french press coffee and I also use it at home but it’s been more of a pain than the Aeropress. the one I use at home is glass and I would never bring that with me camping, I’ve already broken one while washing it in the sink.
They do make stainless steel French presses specifically for camping. The French press is nice and that you’re able to make a few cups at a time if you’re sharing or you know you’re going to drink more coffee.
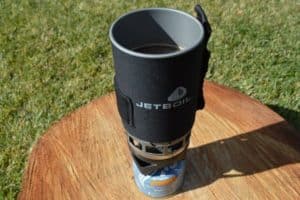
I use a jetboil as my camping stove and they make an accessory to use it like a French press. I do use this because the accessory is only a few ounces and I’m already going to have my jetboil with me. It filters most grounds so you do end up with a few in your cup but I think that’s a small price to pay for the luxury of a French press while camping.
If you already have a Jetboil or a similar camping stove this coffee press accessory is a nice addition to have.
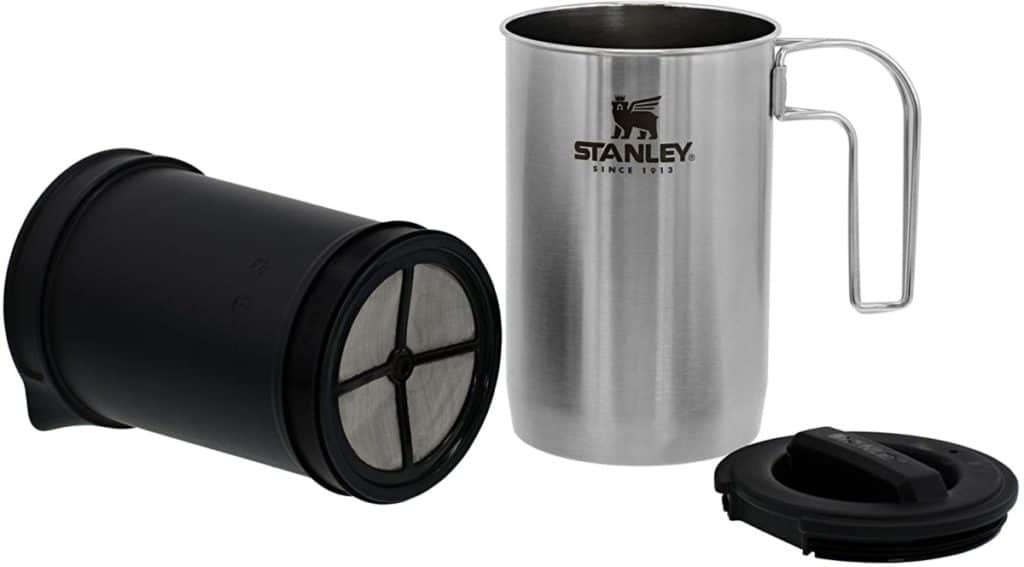
Stanley makes a french press to take with you while camping. The best thing about this is that there’s no glass like a kitchen french press. After using the press, drink straight from the coffee maker. See the current price on Stanley Adventure French Press on Amazon here.
GSI Outdoors Java Press – 11.2 ounces
This is also a cool way to get french press coffee while camping. It’s not specifically for camping and I could see myself using this at home. It’s an all-in-one contained unit, you put the coffee grounds at the bottom, add hot water and let it sit for 4 minutes. Then press the top down.
The lip part you’ll be drinking from is also connected to the top of the plunger. It makes two cups of coffee and it should be easy to clean afterward. Check the current price of the GSI Outdoors Java Press on Amazon here.

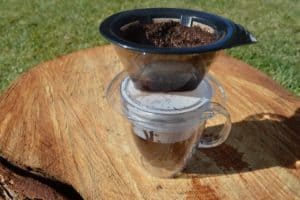
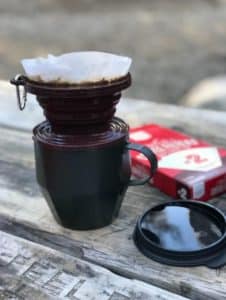
Camping Pour Over Coffee
When you’re brewing coffee by hand it gives you a lot of control over the variables. It’s recommended to use your typical drip coffee grind size. If you pour typically fast or slow or just want to get flavor balances off you can adjust the grind size to your taste.
- With your 200 degrees water, pre-wet your filter. This will get rid of any paper flavors in that coffee filter. It’s also going to make your ceramic or stainless steel filter house and mug warm.
- Pour the water out of the cup you used to pre-wet your filter.
- Set your grounds in the filter.
- Generally, you’ll want a gooseneck kettle or something that’s going to give you a lot of control over the pouring rate. While camping, just work with what you have.
- The first thing you’re going to do is pour a small out amount of water over the grounds and then give it a little stir. This is so everything is nice and evenly wet.
- Start pouring towards the middle then work your way to the outside.
- Make sure you have a nice and even pour if you’re going too fast the coffee grounds inside will still be dry while along the edges will be completely saturated.
- The last step is to give another stir once you’re done pouring water in your pour-over.
We’re making coffee this way because roasted coffee has a lot of CO2 gas buildup from breaking down sugars, so we need to get rid of that gas before adding fresh water to it. If we start pouring right off the bat, that gas will be trying to get out the same time that we’re trying to get water inside and you’re going to end up with something that’s not quite evenly extracted.
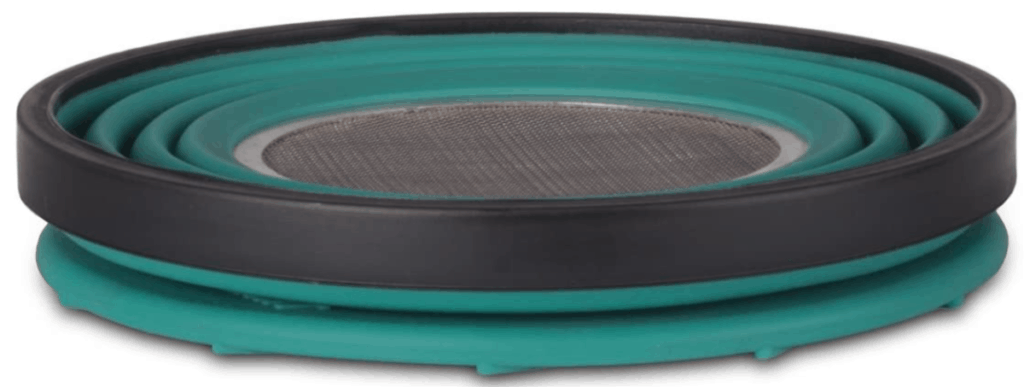
Sea to Summit makes a collapsible pour over that folds flat. You can check out the current price and colors on Amazon here.
Moka Coffee Maker – 1.54 pounds (Aluminum)
A Moka coffee pot brews coffee by passing boiling water pressurized by steam through ground coffee. It’s roughly an hourglass-shaped pot original made in Italy. I’ve heard these coffee pots referred to as espresso pots but modern espresso is pushed through extremely fine grounds in a rigid steel portafilter at pressures from 6 to 15 bars. 1 bar is about 14 pounds per square inch, so they are highly pressurized.
The Moka pot just exceeds atmospheric pressure through more coarsely ground coffee and a much less sophisticated filter cup. Since the coffee is extracted by being “expressed” under some pressure, about 2 bars, it can be loosely considered espresso. See the current price of the Bialetti Express Moka Pot on Amazon here.

- We’re going to start with a course ground somewhere between espresso and drip coffee. If your grind is too fine the coffee can be a little bitter.
- Fill the basket with ground coffee but do not press down or pack.
- Fill the bottom chamber with hot water. The downside of cold is that while you’re heating the water you’re also heating the coffee grounds. Coldwater can also result in bitter coffee.
- After you close it up, put it right on the flame.
- The bottom chamber builds a little pressure pushing the water through our coffee.
- Once you start hearing a hissing and gurgling sound pull the pot off the flame to stop the brewing process.
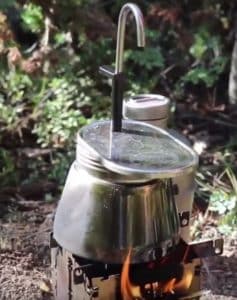
Outdoor Percolator Coffee
A percolator and a Moka pot have a few things in common but some key differences. The percolator is going to be reusing the water that already went through the grounds, the Moka pot does not. So already brewed coffee will get boiled again.
The upside of a percolator is that if you know you’re going to have multiple cups of coffee or you need to share with a group, you’ll get a few cups from the pot.
I always think of a coffee percolator as an old-fashioned timely way of making coffee, probably because this was the way my mother made camping coffee when I was little. See the current price of the GSI Outdoors Percolator on Amazon here.
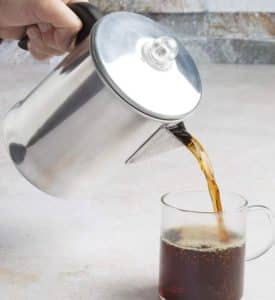
Why have percolators fallen out of mainstream coffee drinkers’ favor? Due to the high temperature, it gives off a metallic, bitter, and dry tasting coffee. You need high heat to create the steam pressure to brew the coffee, so there’s no way around this.
The coffee that is already brewed is then reheated and re-steeped multiple times throughout the process. We don’t normally reboil our coffee already brewed. Everyone has different tastes, so let’s give it a try.
This is an active method of making coffee, so we’re going to need to sit there and watch the percolator on the flame. Watching the pot make my coffee sounds like a great way to start my day before hitting the trail.
- One ounce of coffee grounds is recommended after a few times adjusts to your taste. This is going to be a medium-coarse grounds, not too fine. Keep in mind, Percolators naturally make strong coffee.
- Fill your percolator reservoir with cold water. We’re going to heat the water slowly, so cold water is fine.
- Assemble your Percolator.
- Add the coffee grounds to the basket. We don’t want spillover so make sure to add the correct about of coffee grounds.
- Flame on! If you have a stove with a controllable flame keep it on medium. If not, try to move the pot to an area not fully above the flames.
- Time to sit and watch. Most percolators have a clear plastic knob at the top of the kettle. Once your water is hot enough, you’ll see it bubbling up into the knob.
- Watch as the clear water turns to brown. Remove from heat and carefully discard the coffee grounds.
Brewing with a percolator takes about 5 to 8 minutes. If it seems like your water is still too cold move it more in the flame. If the percolator is getting into a rolling boiler it’s too hot, move it out a little or turn the flame down. It takes practice to make the perfect cup with this method.
Cowboy Coffee
The Cowboy coffee method is going to be the simplest and lightest weight ways to make coffee while hiking. This method doesn’t take filters, pour-over housing, or a large pot. It uses an extraction technique called decoction. Cowboy coffee is intermingled with boiling water during the brewing process.
Why would we want to use this method over the others? With no other items to carry. This will be the lightest way to make coffee and take up less space while backpacking. You also already have all the tools needed if you camp and enjoy coffee.
If you’re not concerned about the weight savings it’s a great way to make a large quantity of coffee at once. Nobody will have to wait around for the pour-over filter to get some coffee. If your pot is large enough, everyone can have coffee at the same time.
- Fill the pot with cold or hot water. Keep in mind to leave room to avoid spillover while heating.
- Put your pot of water on the flame. This can be high heat because we’re just warming the water at this point.
- Once the water starts to boil remove it from the flame for 30 seconds. The will lower the water temperature to around 200 degrees. This was the ideal temperature of the water for coffee that we mentioned above.
- Add 2 tablespoons of coffee to your pot for every 8 ounces of water.
- Stir the grounds and let sit for 2 minutes.
- Stir the grounds for the last time and let the pot sit for another 2 minutes.
- With 4 minutes of total time brewed some cold water to settle the grounds at the bottom of the pot.
- Pour your coffee slowly so grounds don’t flow in your cup.
I’m Including These Two Coffee Methods as the Last Resort
Make your own tea bag method, they do make coffee tea bags for coffee as mentioned above. You can also do this with a regular coffee filter and a rubber band or something to tie the filter with the coffee inside. This isn’t the best bang for the buck because when I did this I opened up the coffee bag and saw that some of the grounds inside are still dry in the center.
This was due to the shape of the filter being round, unlike the coffee tea bags from the store being flat, letting the water soak all the way through. I kind of think of this as a last resort or if you already have the items at home. I also found that this coffee is kind of weak, with a rubber band taste.
An alternative way of doing this is to wrap a rubber band around the filter to the cup. This way you don’t get the rubber band inside your cup affecting the taste of your coffee. This is like the pour-over coffee method.
Coffee Specialty Items For Camping
There’s a whole category of specialty coffee makers that can help you make a great cup of coffee on the trail. Whether these help or add another level of complexity that will be up to you. the first one will look at is the Presto MyJo single cup coffee maker that uses the Keurig K-Cup.
The Presto MyJo
The Presto MyJo is a single-cup coffee maker. It takes K-Cup or reusable K-Cup filters. At home, you could fill the reservoir up with cold water and microwave it for a minute and a half but when camping all it takes is some hot water.
This seems like a cool little coffee maker if you already use K-cups or it can be a more convenient way instead of messing with a bag of coffee grounds. You can see the current price of the Presto MyJo on Amazon here.
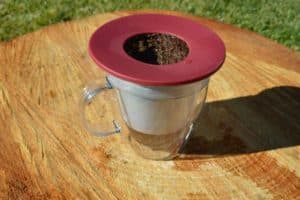
The Primula Brew Buddy
The Primula Brew Budddy is a portable pour-over reusable mesh filter. This is convenient for coffee or tea while camping. It’s different from the normal pour-over method that I mentioned above because the coffee or tea can steep and your cup of hot water, adjusting steeping time to your taste. It’s also incredibly lightweight at 1.6 ounces. You can see the Brew Buddy on Amazon here.
Silicone Pour-Over Collapsible Coffee Dripper
There are quite a few days for sale on Amazon but I’ll mention the Wolecok because it seems like a good deal and comes with a carabiner clip for attaching it to a hiking backpack. This is 100% food-grade silicone, that you can just toss in your back. It’s lightweight and hardly takes any space. See the current price for this coffee dripper on Amazon here.
GSI Outdoors MiniEspresso Set – 1.21 pounds
This coffee maker mimics a Moka Pot. The upper chamber is the coffee cup that you’ll be drinking from. The MiniEspresso looks unusual and if you like Moka pot coffee you’ll enjoy a cup of coffee from this too. It comes in a nice carrying case with a mug as well. You can see the current price on Amazon here.
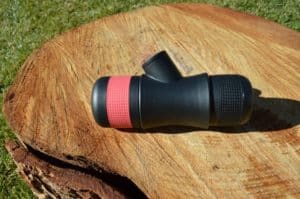
The Minipresso – 13.2 ounces
It’s a compact, lightweight all-in-one unit. This and the Handpresso are the closest we’re going to get to real espresso on the trail. All the other methods and tools above don’t apply the pressure that is needed to make espresso.
The industry standard for espresso is 9 bars (130 psi). The Minipresso is just under that at 8 bars. It only makes about 2 oz of espresso at a time but every time. I’ve brought this with me while camping and everyone wants to try it. Check out the current price of the Wacaco Minipresso on Amazon here.
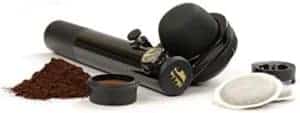
Handpresso – 16.9 ounces
This reminds me of the Minipresso except you’ll pump up the pressure before water passes through the coffee grounds. The Handpresso has a pressure gauge on it so you can be sure the coffee gets extracted correctly.
Premade coffee pods can be purchased for this with 7 grams of coffee inside each pod. With these pods, it’s very easy to clean, with no messy grounds to raise out. Check the current price of the Handpresso on Amazon here.
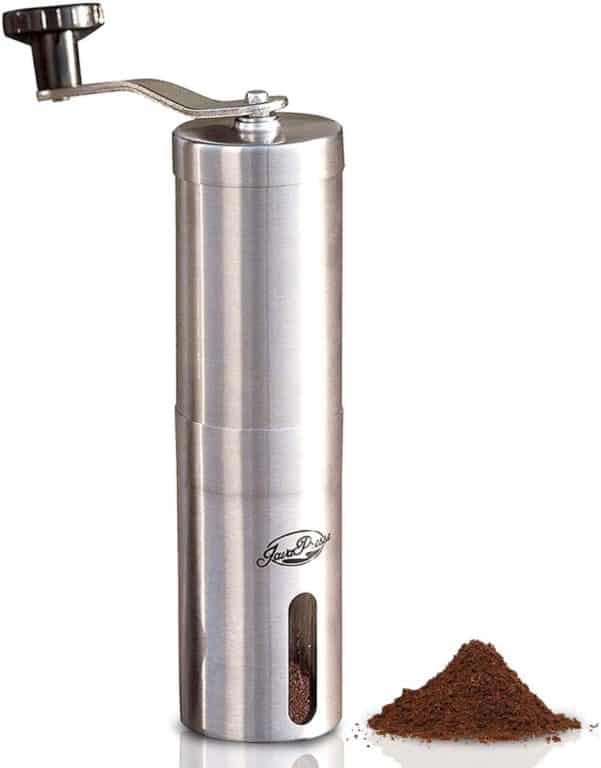
Manual Burr Grinder – 9.4 ounces
JavaPresse manual coffee grinder is a stainless steel burr grinder. I prefer to grind my coffee beans before I go camping because I don’t want the added weight of a grinder. If you need a small manual grinder this will have a great whole bean coffee grinder.
This grinder also has an adjustment for fine to coarse grounds. Check the current price of this Burr Grinder on Amazon here.
Now that we have looked at a few ideas we don’t have to stick to instant coffee while camping. Instant coffee is the most convenient way but there are so many other ways to have a great cup of coffee on the trail.
I’ll add to this list as I try new ways of making coffee while camping. If you have a favorite way or theirs something I missed please let me know down in the comments, thank you.
FAQ – Best Coffee While Camping & Hiking Guide
What Temp Should Water Be for Coffee?
The correct temperature of water for coffee is 200 degrees Fahrenheit. This is the sweet spot for dissolving everything we want to dissolve but not dirtying up the flavor of our coffee.
What’s the Easiest Coffee to Make Camping?
Instant coffee isn’t the preferred method but it’s by far the easiest and almost the lightest option.
How Do You Make Coffee When Camping?
The Cowboy coffee method is going to be the simplest and lightest weight ways to make coffee while hiking. This method doesn’t take filters, pour-over housing, or a large pot. It uses an extraction technique called decoction.
How Long Do You Percolate Coffee on a Campfire?
Brewing with a percolator takes about 5 to 8 minutes. If it seems like your water is still too cold move it more in the flame. If the percolator is getting into a rolling boiler it’s too hot, move it out a little or turn the flame down. It takes practice to make the perfect cup with this method.