A “fourteener” or “14er” is a term to describe a mountain that is over 14,000 feet. While Alaska, California, and Washington have a few 14ers, Colorado boasts 58 ranked peaks over 14,000 feet, the most of any state in the United States.
Hiking a 14er not only offers the natural wonders of a hike such as time in nature, breathtaking views, and physical exertion but also adds in the challenge of less oxygen.
Hiking a 14er is a rite of passage for many Colorado locals or a challenging adventure for Colorado visitors. If you are thinking about adding a 14er to your hiking bucket list, here is everything you need to know about hiking your first 14er.
How Long Does It Take to Hike a 14er
Generally, most 14ers can be hiked in one day; however, some peaks can be made more enjoyable by splitting them up into two days. For example, Longs Peak in Rocky Mountain National Park is a Class 3 14er totaling 15 miles.
Because of the length and difficulty, this 14er might best be done by camping at the Boulder Field the night before. For this article, we will focus on preparing for hiking a 14er in one day.
What Is the Best Time of Year to Hike a 14er
Fourteener season typically starts around the end of June or the beginning of July. This is all dependent on when the last remnants of snow are clear from the trails. Fourteener season tends to end towards early October.
Again, this is dependent on snowfall and if it sticks around. Some 14ers are possible in the winter, but without proper knowledge on hiking in the snow, avalanche safety, and snow climbing gear, it is not recommended to pursue a 14er once snow makes the trails difficult to navigate.
How Can I Prepare to Hike a 14er
Before hiking a 14er, it is important to make sure you are prepared both physically and mentally. This can be done by working on your fitness, acclimating, and planning ahead for your upcoming hike.
Pick an Attainable 14er to Hike
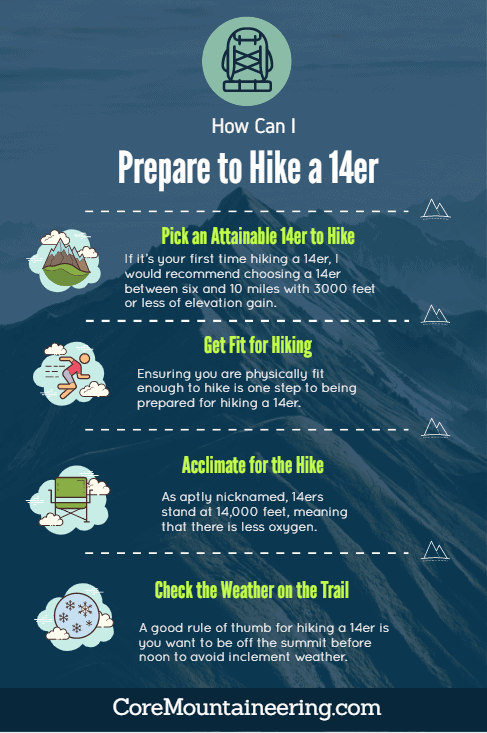
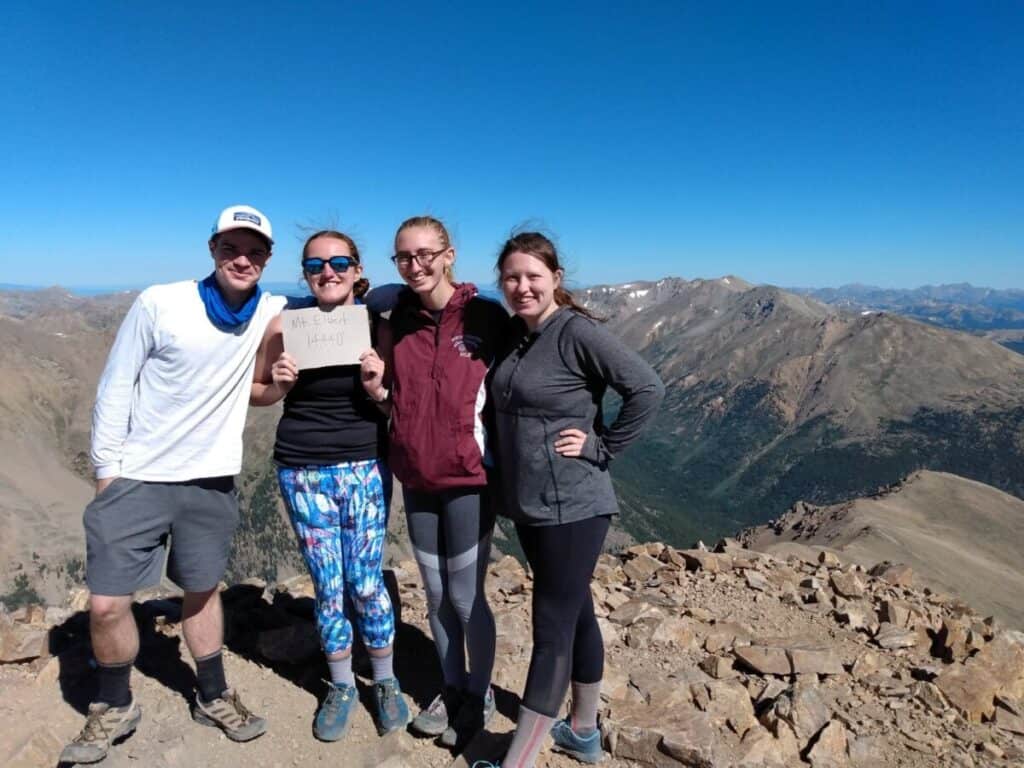
The first step to preparing to hike a 14er is picking a 14er to hike. If it’s your first time hiking a 14er, I would recommend choosing a 14er between six and 10 miles with 3000 feet or less of elevation gain. I personally recommend Mt. Bierstadt or Quandary Peak.
Get Fit for Hiking
Ensuring you are physically fit enough to hike is one step to being prepared for hiking a 14er. Try adding in training hikes before your next 14er hike. I usually try to hike longer trails and a few lower elevation mountains to prepare myself for 14ers. You don’t need to be an athlete to hike a 14er but being in generally good shape is a good start.
Acclimate for the Hike
As aptly nicknamed, 14ers stand at 14,000 feet, meaning that there is less oxygen. According to Altitude Physiology Expeditions (APEX), the air becomes thinner the further you go up in elevation because there are fewer molecules or less pressure. This can increase the risk of developing altitude sickness.
Hiking a 14er as your first mountain or as soon as you arrive from lower altitudes will put you at risk of developing altitude sickness.
Without giving your body time to adapt, you will start to breathe faster to increase the amount of oxygen that gets into your blood, and heart rate will increase as your heart tries to keep up with pumping more blood to increase the supply of oxygen to the rest of your body.
In summary, you need to give your body time to adapt to the decrease in oxygen molecules. This is known as acclimatization.
While it can take a month or more to completely acclimate, typically 1-3 days at a high altitude can help your body adapt to the changes and prepare you for that 14er hike. Acclimating combined with a few lower elevation mountain hikes is the ultimate recipe for preparing for a 14er.
Check the Weather on the Trail
Checking the weather before hiking a 14er will help you determine the best day and time to go so you don’t get stormed off the mountain.
Getting caught above the treeline in a storm is a terrifying and dangerous because of the lightning risk at high elevations.
A good rule of thumb for hiking a 14er is you want to be off the summit before noon to avoid inclement weather.
I recommend using www.mountain-forecast.com to check the weather before your hike. This website gives you the six to 12-day weather forecast, including temperature, precipitation, and wind speeds at different elevations, so you know what to expect.
Plan Your Route
Preparing to hike a 14er requires planning your route. Planning your route not only will help you know how to reach the summit but will allow you to estimate how long the hike will take. While many 14ers have a distinct trail to follow, many require route finding.
Reading up on trip reports as well as reviewing the trail maps can help you plan your route. While there are many resources to help you plan your route, our favorite resource for Colorado 14ers is 14ers.com. This site contains trip reports, trail descriptions, and printable maps to help you prepare for hiking a 14er.
Prepare the Night Before
Once you are fit, acclimated, and have the when and where figured out for your 14er hike, all that is left to do is prepare the night before your summit attempt.
Luckily for you, I put together a guide on, How to Prepare for a Hike the Night Before.
What Should I Wear When Hiking a 14er
Make like an onion and plan for wearing layers when hiking a 14er. Between changing elevations and uncertain weather conditions above the treeline, layers are the best way to go hiking a 14er.
Rain, thunder, snow, and high winds are all possible, sometimes in one day, when hiking a 14er, so be prepared with extra layers can make sure you are comfortable in any weather condition.
- Moisture Wicking Short Sleeve Top – When hiking a 14er, I always opt for a moisture-wicking short sleeve top. While it might be cold at the top of a 14er, that doesn’t mean you won’t sweat. Additionally, avoid any cotton materials because cotton dries slowly. A short-sleeve top will also come in handy as you descend back to the trailhead as warm temperatures of the summer day heat the trail and your body.
- Hiking Pants – Hiking pants not only protect your legs from twigs, rocks, and other hiking debris, but they also breathe, keeping your legs cool.
- Hiking Shorts – Having a pair of moisture-wicking shorts or a pair of convertible hiking pants will also help with comfort while hiking a 14er when hiking pants get too hot.
- Wool Hiking Socks – Wool hiking socks will help prevent blisters because they provide protection from the rubbing your hiking boot or shoe may cause. Additionally, when the wool gets wet, it will stay warm, keeping your feet toasty if you end up splashing your feet in the water while hiking a 14er. We have a great article about how to pick sock to prevent blisters out on the trail.
- Hiking Boots/Shoes – A pair of hiking boots with good traction and ankle support are a must when hiking a 14er. If you’re looking for hiking boots, we have an article about how much room you should have in them.
- Insulated Layers – A fleece mid-layer and/or a puffer jacket is a must when hiking a 14er. Because of the temperature fluctuations, having warm layers to throw on will help keep you warm when those winds hit, and the temperatures drop.
- Backpacking Rain Gear – Mountains can create microclimates. When the weatherman predicts sunny and 75, always anticipate an afternoon storm in the mountains and pack rain gear. Rain gear includes a rain jacket and rain pants.
- Hat and Gloves – The top of a 14er can be cold and windy, so packing a hat and gloves will keep you warm for your summit picture.
What Should I Bring to Hike a 14er
A Friend
It is always best to have another person hiking with you, especially when hiking a 14er. You never know if you might get into a tricky situation, and having a friend to encourage you to keep going is beneficial.
A Hiking Pack
While we have the Ultimate Guide to Choosing the Right Hiking Backpack, when hiking a 14er, opting for a pack with certain features will set you up for success when hiking a 14er.
- Size – You want to make sure you have a decent size daypack that can carry everything you need. I recommend investing in a 20 to 30 liter pack as this size is typically suitable for most Colorado 14er hikes.
- Durability – It is also important to choose a durable pack. Some 14ers require Class 3 or Class 4 maneuvers, which means your pack might be subject to abrasion. Having a durable pack will make sure your pack can handle many more 14ers.
- Waterproof Dry Bag & Rain Cover – We recommended investing in a dry bag and a pack with an integrated rain cover. This will help ensure the things in your pack stay dry. Do you need help choosing a dry bag? Check out our Ultimate Guide to Waterproof Dry Bags.
- Optional Features – In addition to our must-have features section, I also recommend choosing a pack with trekking pole attachments and a place to clip in a helmet just in case the 14er you are hiking requires these additional gear options.
Osprey offers an All Mighty Guarantee (at the bottom of the page) with their packs, which means you can get your pack repaired or replaced if you damage it. Some of their packs come with an integrated rain cover, so you don’t have to buy dry bags.
They offer various packs suitable for your next 14er hike, such as the Men’s Talon 22 available on Amazon or the Women’s Tempest 20, also found on Amazon.
The Ten Essentials
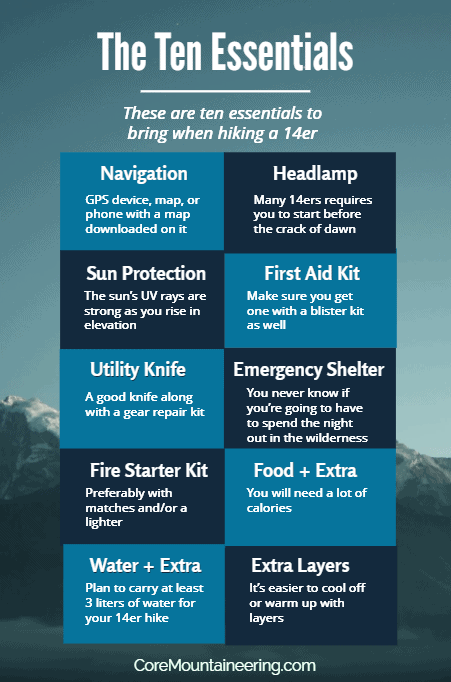
The Ten Essentials list first appeared in 1974 in the third edition of Mountaineering: Freedom of the Hills. As the name alludes, the Ten Essentials are “essential” to bring when hiking a 14er.
- Navigation – such as a GPS device, map, or phone with a map downloaded on it.
- A headlamp with Extra Batteries – Many 14ers requires you to start before the crack of dawn when the stars are still shining. Check out our article about headlamps here.
- Sun Protection – Such as sunglasses, a hat, and sunscreen. The sun’s UV rays are strong as you rise in elevation, making sun protection even more important when hiking a 14er.
- A First Aid Kit – Make sure you get one with a blister kit as well.
- Utility Knife – A good knife along with a gear repair kit.
- Shelter or an Emergency Bivy – You never know if you’re going to have to spend the night out in the wilderness due to extenuating circumstances. Check out our great article about small emergency shelters, How Not to Die in the Woods!
- A Fire Starter Kit – Preferably with matches and/or a lighter.
- Food + Extra (at least an extra day’s worth) – You will need a lot of calories to have the energy to make it up a 14,000-foot mountain.
- Water + Extra (at least an extra day’s worth). Plan to carry at least 3 liters of water for your 14er hike.
- Extra Clothes Layers – It’s easier to cool off or warm up with layers instead of one heavy layer.
Extra Hiking Socks
Hiking a 14er can be a wet experience depending on glacial runoff and the weather. After soaking my whole foot in a creek and having to hike with wet socks, I always bring an extra pair of socks. Injinji hiking socks are poplur among hikers, you can check them on Amazon here.
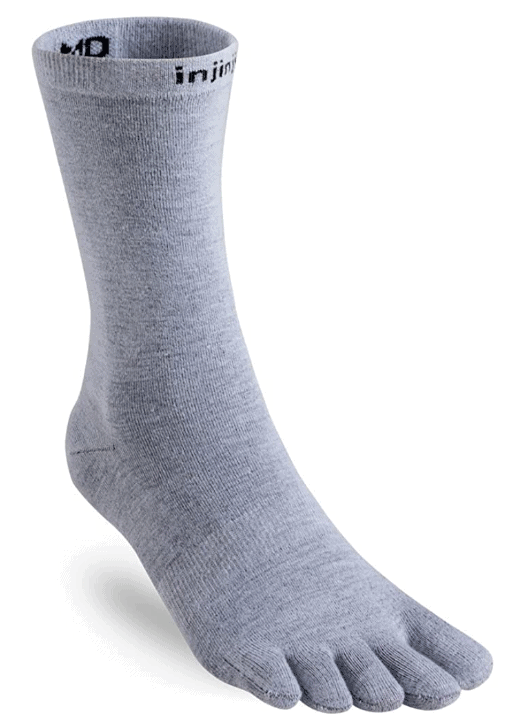
Wet socks can increase the chances of developing blisters and can be just downright uncomfortable. Bringing an extra pair of dry wool socks will make sure you are comfortable when hiking a 14er.
A Buff/Bandana
I have found that these come in handy in windy conditions. Windburn is a thing, and believe it or not, most 14ers are pretty windy at the top. Having a buff to use as a face shield will protect your face from those chilly, windy conditions.
Trekking Poles
We recommend Investing in a pair before hiking a 14er. Without a doubt, hiking a 14er will be hard on your quads and knees both on the way up and on the way down.
Trekking poles help reduce the stress on your lower body because they provide balance and support.
Toilet Paper
You never know when nature might call, so make sure to pack toilet paper when hiking a 14er. Also, follow Leave No Trace principles and bring something to pack it out with.
A Helmet
The decision to bring a helmet depends on the class and difficulty of a 14er. You can check out what the different classes of hiking trails are here at 14ers.com.
If it’s your first 14er, you will most likely choose a 14er in Class 1 or Class 2 category. If you opt for a Class 3 and Class 4 14er, these can pose additional risks such as loose rocks and exposure that may require a helmet.
Optional: Summit Beverage or Victory Snack
There is nothing better than cracking a cold one or enjoying a celebratory snack at the top of the summit after a long, labor-intense hike. If you’re not feeling like an alcoholic beverage, try bringing a Gatorade or your other favorite drink to celebrate with at the top of a 14er.
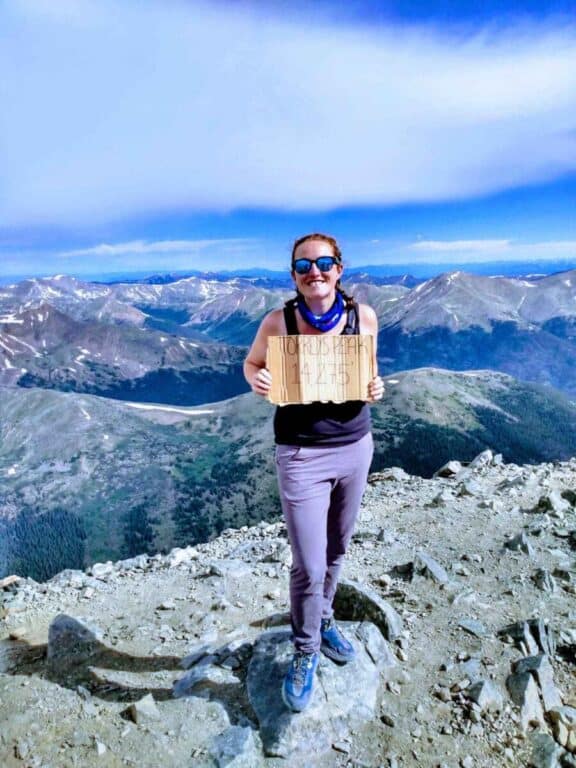
When I reached the summit of Longs Peak, I pulled out a whole box of Little Debbie’s Swiss Cake Rolls to enjoy (and share) at the top as I took in the views.
What Are Some Other Tips for Hiking a 14er
Now that you know how to prepare for a 14er and what to bring, here are a few other pro tips to consider when hiking your first 14er.
Plan Your Hike for a Weekday
Colorado 14er season is short, which means those weekend warriors will try to get their peak bagging done on the weekends. Most of Colorado’s 14er trails are akin to I-25 in the summer: busy, crowded, and sometimes there’s a traffic line of people to the summit.
When choosing which day to hike a 14er, if possible, opt for a weekday. By choosing to hike on a weekday, you will be more likely to find optimal parking and avoid those weekend crowds of hikers trying to bag their first or next 14er.
Hydrate
The Wilderness Medical Society states that you can lose water twice as fast at high altitudes than at sea level, so it is important to stay hydrated before, during, and after hiking a 14er.
Staying hydrated can help reduce the chance of developing altitude sickness. Make sure to drink extra water at high altitudes.
Keep in mind, when hiking a 14er, if you start to feel thirsty, you are already dehydrated.
Fuel Your Body Up
Hiking a 14er will require 6 or more hours of strenuous activity, which means a lot of energy and nutrients are required. Between the lack of oxygen, hiking distance, and elevation gain, you will want to properly fuel up for your hike.
Eating a hearty meal the night before your hike, as well as a nutrient-dense breakfast, will make sure you have the energy when you start your hike. But fueling up for hiking a 14er doesn’t just end there.
Ensuring to pack high calorie, nutritious snacks will help keep your energy levels sustained when you feel like giving up. When choosing what to eat for your 14er hike, opt for carbs, proteins, and healthy fats.
- Carbohydrates such as whole grain pasta and rice provide long-term energy.
- Proteins like nuts and beef jerky help restore the muscles you are breaking down.
- Healthy fats such as avocados and cheese keep you full longer.
Start Early
When I set my sights on hiking Longs Peak, I attended a program led by a climbing ranger who worked in Rocky Mountain National Park. While he gave a lot of helpful advice, one of the main pieces of information I took away from the session focused on start time.
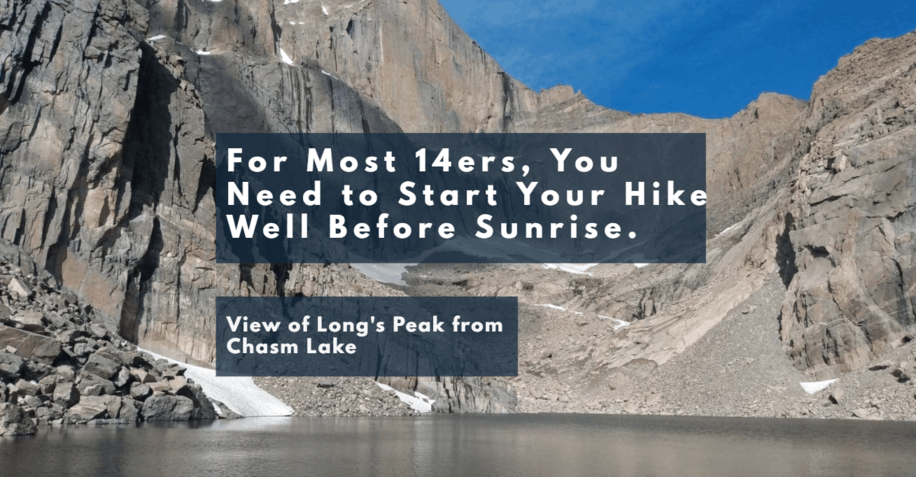
For most 14ers, you need to start your hike well before sunrise. For Longs Peak, most people start between 1 AM and 3 AM, and as the ranger put, “this shouldn’t be the first time you are waking up this early for a hike.”
Slow and Steady Wins the Race
Hiking a 14er is almost no different than other hikes. They might be steeper, longer, and lacking oxygen, but as long as you put one foot in front of the other, you will make it to the summit regardless of if you are a beginner or expert hiker.
There is no point in racing up the mountain and using up all of your energy. Keeping a slow but steady pace can help push you up those final stretches of the trail. If you are tired, refresh your tired limbs by stopping to take a few breaks here and there.
Make sure to stop and take snack breaks when you feel hungry. Refueling will help sustain your energy to get you to that summit.
Don’t Be Afraid to Turn Around
Many reasons may force you to turn around and dash those 14er summit dreams. You fall victim to altitude sickness. Maybe some unexpected bad weather rolls in, halting your hike. Whatever the reason may be, do not be ashamed of having to turn around.
Focus on YOU because your safety is the most important part of the hike.
Remember, if you don’t make it back to the trailhead, the hike was not successful.
Enjoy the Summit!
Do not forget to stop and enjoy the summit. You didn’t hike up to 14,000 feet to just hike down right away. Make sure to enjoy your accomplishment at the top. You will find some of the best views at the top of a 14er, so find a spot to sit down, enjoy your summit beverage, and take in the vast expanse of beautiful scenery in front of you.

