The right-size hiking backpack can make your trip delightful or miserable. The key to finding the perfect backpack is a balance of size, features, and comfort. Each person on a backpacking trip will have different needs, wants, and body styles. Choosing a backpack to fill these needs and desires can be simple with this guide.
I’ve tested and researched tons of packs over the years. From short day treks to more extended expedition hikes – peak to peak. We’ll go over everything; from the fit, materials, features, and how to clean and maintain your pack. But first, let’s go over the basics of hiking backpacks. We’ll start with the first thing you need to decide: where are you going to be hiking?
Where You Will Be Hiking
This is the first thing you’ll have to decide. Don’t get too caught up in this part though. Many backpackers end up with multiple packs to meet the needs for short or long hikes. By knowing where you’ll be hiking and how long, is how you’ll decide on the backpack capacity.
A larger backpack will have straps that are designed to transfer most of the weight on your hips. The weight feels about 20% on your shoulders and 80% on your hips.
These hiking backpacks are designed for longer trips. You’ll be able to bring everything you need for multiple days out on the trail.
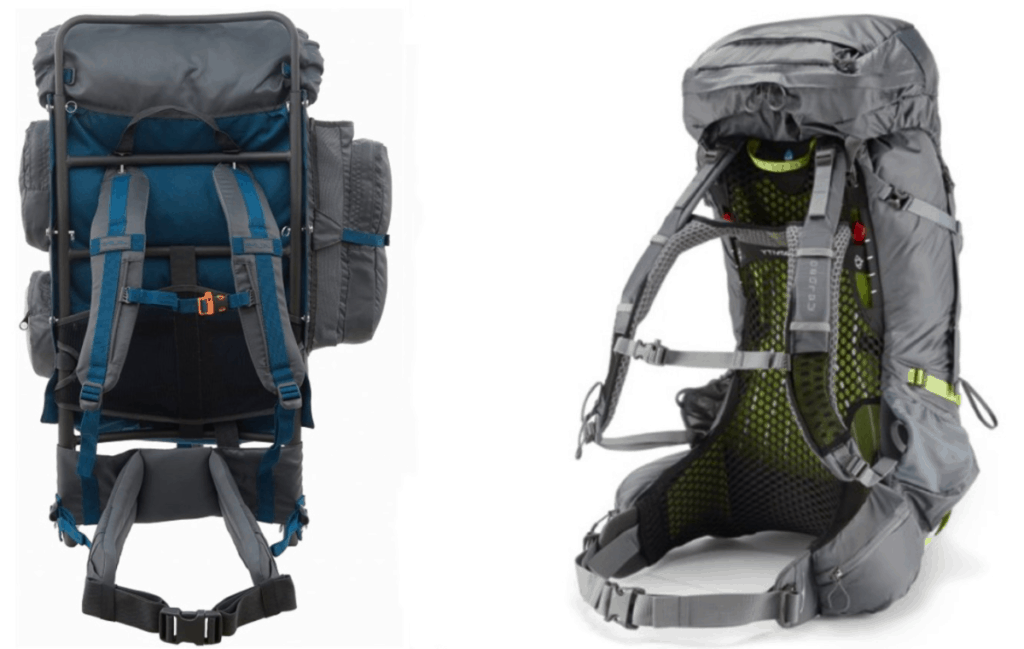
Internal Frame vs. External Frame
An internal frame backpack is lighter than an external frame while staying tight on your body. Internal frame packs are more common, partially because they have a better balance on your back while you hike.
They’re not going to move or float on your back as an external frame will. With this style of backpack, it will be easier to traverse terrain because the backpack hugs your body for better balance.
An external frame backpack is going to be heavier than an internal frame. They’re less common today, but I do see them out on the trail. An external structure is going to feel different on your back. They feel like they’re floating on your back, not hugging like an internal frame.
The external frame pack has a much higher center of gravity; therefore, you’ll walk more upright. These backpacks are popular among hunters that need to attach a ton of gear on the frame.
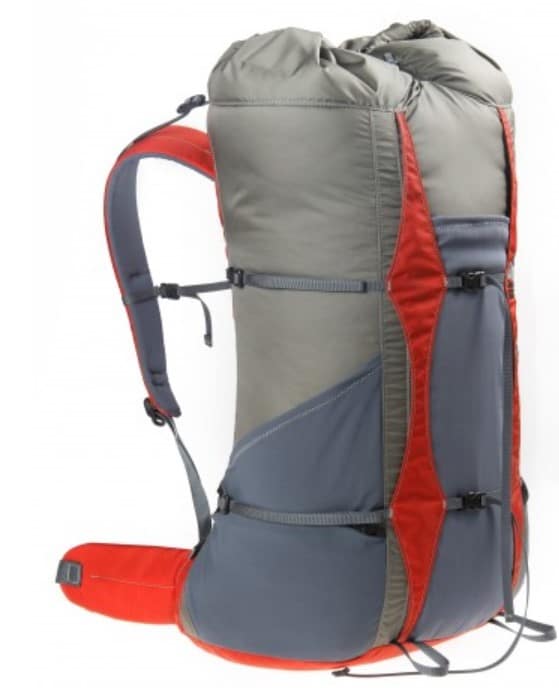
Frameless Hiking Backpack
A common misconception is that all frameless hiking backpacks are ultralight, but that’s not the case. One of the significant advantages of frameless is being lighter than built-in frames, but there are other advantages as well.
Simplicity
Frameless packs will have a design with fewer features. Fewer zippers and compartments. If these features are not needed, that means less stuff will go wrong, or break on the pack. Take inventory of what’s really needed on a weekend trip and see if you need all those pockets.
Size
Typically a frameless pack will be smaller than a large framed hiking backpack. They range from small 20 liters (L) to larger 55L backpacks. With less space, it will be easy to focus on what’s needed.
If I take my 70L internal frame backpack out for the weekend, I usually feel the need to fill all that space. Not so with a frameless pack because there’s less space, I only bring what’s needed.
Loading a Frameless Backpack
If loaded the correct way, they will be just as comfortable as an internal frame. More thought will have to go into how it’s packed. For instance, lining the pack with your unrolled or folded sleeping pad as a substitute frame, is a great start. With this, a well-made frameless backpack will mold to the contours of your back.
When a frameless pack is overloaded, past what it’s designed for; it will be uncomfortable. Trying to push a frameless pack for a few extra days on the trail will be met with pain and frustration.
Durability and Weight of Frameless
As mentioned above, one of the significant reasons for hiking with a frameless hiking backpack is the lighter weight and simplicity. This does not come at the cost of durability, though. They will last just as long as other packs, given they are not overpacked too often. When they do fail, it’s typically overstretching around the shoulder area.
Cost
This is the second major advantage besides weight. There’s a wide range of prices for frameless, just like every backpack, but an entry-level can be purchased for under $30. Take a look at the G3Free Frameless hiking backpack on Amazon. This is a day hiking pack, which meets the basic needs of someone getting started.
If you want to look at the upper end of frameless packs, look at the Granite Gear Virga 2 Backpack 52L. This is of higher quality than the G3Free, with better materials from a reputable American company.
What Features on a Hiking Backpack Should I Look For
One of the many ways manufacturers differentiate packs is through features. Preferably, we would have all these features, but sometimes sacrifices for weight and cost need to be made. Regardless of what backpack you choose, some features are must-haves. Whatever backpack you decided on should have these features.

Must-Have Backpack Features
- Adjustable/interchangeable length hip belt – I wouldn’t buy a backpack without an adjustable hip belt. You’re not going to be one size forever, just eating a large meal then putting your pack on will make the hip belt tight. During long hikes, I often adjust my pack when I’m starting to feel uncomfortable.
- Side water bottle pockets – The value is easy to see with a pocket for a water bottle, even with an internal bladder. Tired of only drinking water, mix some powdered drink in a water bottle because they are easier to clean than an internal bladder.
- Load lifters – These tighten the straps to bring the upper part of the backpack a bit closer to your back. These are only a must-have for anything larger than a day pack. This is also something that will need to be adjusted throughout the hike to be more comfortable.
- Rear stretch pocket – A quick pocket to throw a windbreaker in is a useful feature. My current large multi-day backpack doesn’t have one, and I miss this feature. My next pack will have to have this.
- Hydration bladder reservoir – A quick sip of water while walking is convenient. Reaching for a water bottle on the side of a pack makes you break stride, slowing your rhythm.
Additional Features That Are Not Must-Haves
These are some features to look out for, but if they aren’t on a backpack, it wouldn’t be that big of a deal. These features are for you to decide if they are a must-have or not.
- Hip belt pockets – These pockets are so small and they don’t hold much anyways. If you are used to having these pockets, I can understand why they would be a must-have.
- Ventilated back piece – For a large hiking backpack, this should be included. Hiking for more than three days in warm weather can make a mess on your back. For smaller packs, they aren’t needed.
- Adjustable length torso – More expensive multi-day packs are going to include torso length adjustment. This is one feature you usually only adjust once to your frame, then never change again.
- Floating lid – These are detachable top lids that come off a hiking backpack that can be used as a day pack. I do use this feature, but I find myself using a dry bag with a strap as a day hike bag once camp is set up.
- Trekking pole holders – Many backpacking packs come with these because they are only a few pieces of fabric sewn into the bag. If you always use hiking poles, I can see why this feature is a must-have.
Day Hike Backpack
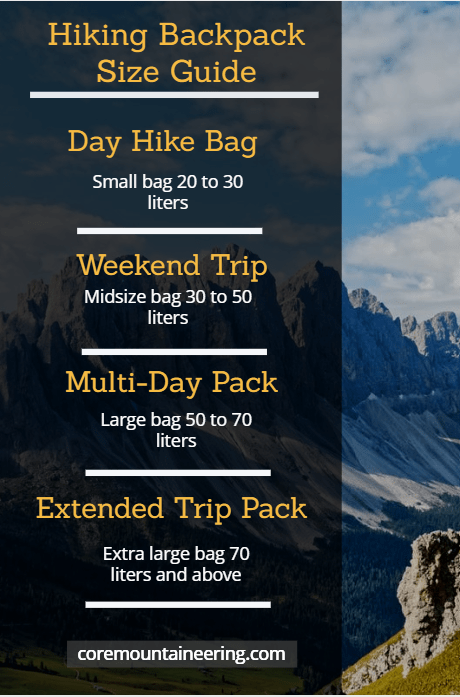
A reliable day pack will be a staple of every outdoor enthusiast’s gear collection. This is a small bag of around 20 to 30 liters in size. It’s going to be the smallest of backpacks for hiking because you don’t need sleeping gear. Without having to carry a tent, sleeping bag, and overnight food, this pack will be easy to carry.
A few additional items to consider for a day hike are a knife, emergency shelter, first aid, and a camping headlamp.
Even though your phone has a flashlight on it, a headlamp or extra flashlight is a good idea. Just in case you push the daytime limit and are walking to your car at night.
Consider using a dry bag for a day hike pack. I go into more detail about them below, but fundamentally they are a simple waterproof bag with a folding top that varies in different sizes and colors. A 20-liter bag with a shoulder strap can make a nice day hiking bag that’s a cheaper alternative to a dedicated backpack.
Osprey makes a variety of hiking packs, but their Osprey Talon 22 can be the cornerstone of your backpacking adventures. This day pack is well made and even has an area for a hydration bladder. Check it out the Osprey Talon 22 on Amazon here.
Backpacking Weekend Trip
30 to 50 liters backpacks are great for overnight and weekend trips. This size bag can be used for warmer weather where you don’t need a ton of winter gear. Be sure your bag comes with a dedicated water bladder as some bags will omit this feature.
30 to 50 liters is large enough for a tent, sleeping system, and overnight gear. You might find it a bit too small if you’re going out for more than a few days.
If you’re just starting camping and hiking, this is the size I’d recommend. You can always get a larger size the more experience you gain on the trail. If you find that you’re overpacking this size, then try out a multi-day backpack.
Take a look at the Osprey Rook 50 hiking backpack on Amazon. I like that it has a ventilated back panel with an adjustable shoulder harness to fit a wide range of torso lengths. It also has hip belt pockets if this is a feature you’d like to have.
Backpacking Multi-Day Pack
50 to 70 liters backpacks are great for a trip lasting one to two weeks. This is great for carrying a few layers of clothing and extra fuel. It’s usually the size hiking backpack I take with me. This is a very common size for people on the trail that are going to be out for a few days.
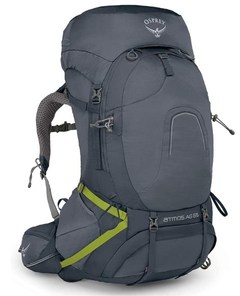
If you’re using this size for a weekend trip, remember it doesn’t have to be full. Just because you have space doesn’t mean you have to use it all. Osprey Atmos AG 65 is one of the best multi-day backpacks. This pack has the top feature most people are looking for. See all the features of the Atmos AG 65 and current prices on Amazon here.
Backpacking Extended Trip Pack
70 liters and above. There is a thing as overkill, but this can be the perfect size for extended outings. These are made to haul a ton of gear for extended long trips in the mountains. This size is great for mountaineering and winter backpacking.
Extended trip backpacks are also great if you’re going with children and are need to pack their gear as well.
The recommended pack for extended trips is the Gregory Mountain Baltoro 95. Make no mistake; this is a huge and heavy backpack. I’ve read some reviews saying it too heavy but, the backpack is made to carry everything you need for weeks at a time. Check the availability of this backpack on Amazon here.
Ultralight Hiking Backpacks
Ultralight bags are going to be smaller and lighter than a conventional hiking backpack. These packs weigh less because you’re going to be using less gear, and the equipment you are bringing will be lighter.
I’m not an ultra-light enthusiast, I like to bring extra luxuries with me when camping and hiking, but I do get the appeal of carrying a light load. When reducing the amount of weight you bring backpacking, you’ll be more comfortable and save energy. It can also be easier to focus on the scenery with a lighter pack.
Ultralight and lightweight backpacks are pretty much the same things but with different weight distinctions. A lightweight backpack will have a base weight of 20 lbs or less while an ultralight backpack will have a base weight of or 12 lbs or less. The same concepts apply to both.
Base Weight is the total weight of your entire gear kit, excluding consumables which are food, water, and fuel.
While they don’t do as good a job transferring weight to your hips as an internal frame hiking backpack, with a light load, you may not need that. They are basically rucksacks with shoulder straps. They do offer some protection and comfort when hiking, though.
When choosing to go lightweight keep three things in mind:
- Leave unnecessary gear at home. Do you really need a camping chair or those extra clothes?
- Replace the most substantial items with lighter ones. A tent might not be necessary and can be easily replaced with a tarp for shelter.
- Focus on multi-purpose items. Your dry bag can be used as anything from a bear bag to a sleeping pillow, even a clothing wash system.
Hiking Backpack Material
This is a whole subject in and of itself. Most packs are going to be made of Nylon and Polyester, while both of these fabrics are synthetic, Polyester offers some advantages. It’s superior in UV performance but Nylon is pound for pound tougher than polyester.
A spec you’ll see in backpack fabric is Denier. The (D) at the end of the number is referring to Denier. Denier is a metric used to describe the thickness or density of the material. The higher the Denier, the stronger the fabric, but only if we’re talking about the same type of fabric. For example, 450D nylon is much stronger than 600D polyester.
This does not translate directly across all fabrics. Generally, for backpack fabric, it’s a metric for understanding the durability of the bag. Each fabric is also inherently different in strength.
This is why some backpacks you’ll see online are going to be more expensive while looking the same from the outside. They use higher quality material, making the pack more expensive. This comes with the added benefit of overall lighter weight.

Let’s look at a comparison of these two backpacks—the MountainTop 40L vs. Osprey Archeon 45L. The MountainTop is made of polyester with a thin frame. Not just the material, but even the stitching is not as good as the Osprey Archeon.
MountainTop doesn’t even show the material thickness; I’ve looked all over, and I can’t find the polyester they use. This is probably because they don’t want their customers to know, or notice. Reading reviews of the backpack buyers say the material rips and tears easily, and it’s not suited for outdoor use. You can read all the reviews for this backpack on Amazon here.
Osprey uses 1880D Nylon on the Archeon 45L. This is thick, high-quality nylon made to take abuse. It comes with an adjustable harness system with an aluminum frame. Thought and care are even put into the hip belt. Seamless lumbar-to-hip belt body wrap transfers load from frame to hip belt. You can see the rest of the features on Amazon here.
I realize this is a dramatic comparison, but my point is to show the quality of material used on something you’ll be relying on for miles out on the trail.
How to Properly Fit Your Hiking Backpack
With your pack holding everything for days at a time, the proper fit is essential. The correct fit will ensure the load remains secured and balanced to your body while being comfortable to move around.
This process is straight forward with the first measurement being a torso-length measurement. You can do the measurements by yourself, but it helps if someone can give you a hand.
Step 1: Find your iliac crest. This is the area where arching bones sit on either side of your pelvis. Then find your C7 vertebrae. This is the vertebra that sticks out when you tilt your head down.
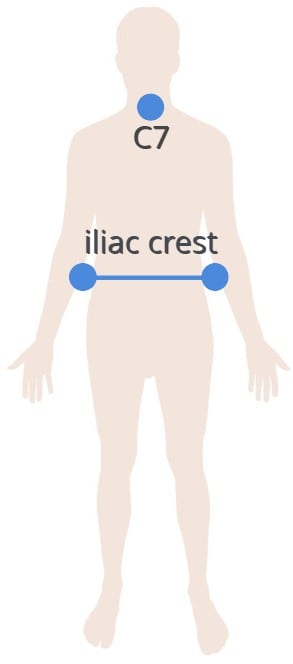
Step 2: To get your torso length measure from your C7 down to your iliac crest.

When you’re looking at backpacks, you’ll see in the technical specification the torso length the pack is designed to fit. For finer adjustments, look for hiking backpacks that can adjust the torso length a few inches up or down.
Fine-Tuning the Fit of Your Pack
After you have decided on a pack and adjusted it to your torso, it’s time to make some fine-tune adjustments.
- Loosen the straps on the backpack including the hip belt and add about 20lbs inside the pack.
- With the backpack on and the hip belt over your hip bones, secure the buckle. Adjust the hip belt on both sides of the buckle. The buckle should be centered. Keep in mind that the belt should be snug, yet comfortable. The hip belt will support about 80% of the pack weight.
- Tighten down the should straps so they are rounded over the shoulder. You do not want a gap between the top of your shoulder and the shoulder strap.
- Pull the load lifter straps toward the front of you. These straps are to lift the load of the backpack off your shoulder, onto your hips. Make sure not to tighten the load lifter too much as a gap will form between the top of your shoulder and the shoulder straps.
- Adjust both sides of the sternum strap so it’s comfortable across your chest. This strap provides extra support while keeping your arms free.
During long hikes, the load lifters are something I have to adjust to stay comfortable. You might find that a few miles in or hiking uphill you’ll need to adjust a few straps. This is perfectly normal.
Pack Adjustment and Tips for Bigger Guys
For men with “no hip curve” or men with large bellies “inverse hip curve,” carrying 80% of the pack weight on your hips is going to require the waist belt to be so tight you’ll have significant skin abrasion on long hikes. Nothing is in a fixed position for the person with a more massive build.
As you walk for miles, you’ll be adjusting your straps through the hike. The best technique is to start the day with 50-70% of the weight on your hips, then adjust the backpack throughout the day.
Moving the load of the pack more on your shoulder and switching whenever you start to feel discomfort. This is where bringing your base weight down will help in your overall enjoyment on the trail.
If you’re looking for a some suggestions you can checkout this link, backpacks for large men.
How to Pack a Hiking Backpack
An adequately packed bag will save you from back pain as well as keep all your belongings organized. Some packs have separate compartments for items. Generally, this is how you’ll want to put all your gear inside your backpack.
Main Compartment
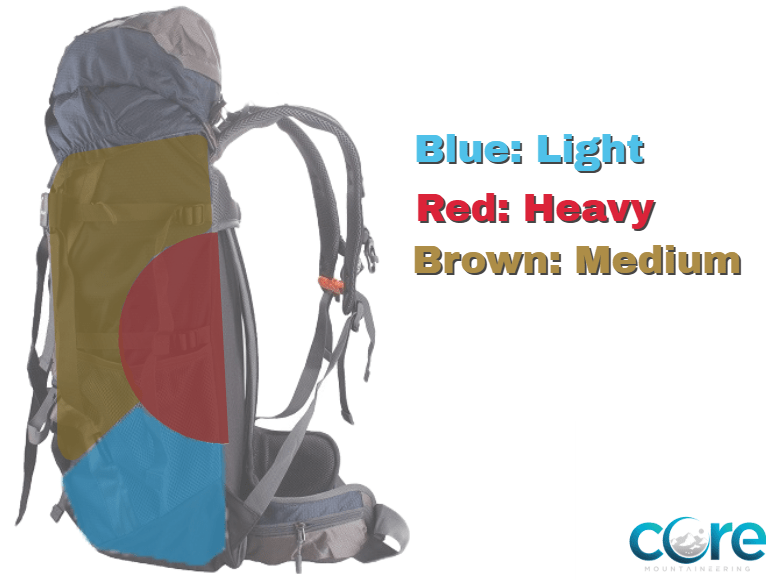
First, you’ll want to put your sleeping bag on the bottom of the pack. This will raise all the heavy items, and you are only going to need to pull your sleeping bag out once a day. Most hiking backpacks will have a separate lower compartment for this. It’s recommended to carry your sleeping bag in a compression sack so it should fit nicely on the bottom.
If your sleeping pad isn’t going to be attached to the outside (like a folding or rolling foam pad), then this is the next piece of gear that will go in. This is also nice because you’ll only be pulling it out once a day.
Next, after sleeping bag and pad will be your tent, tarp, or hammock shelter. This should be positioned in the middle of your back or between your shoulder blades.
Then, put your clothes that are stuffed in a dry bag. This will go right on top of your outdoor shelter.
Now, it’s time to put your stove and cook kit inside. It can fit next to your dry bag if it’s not too large or right on top. If you can, put your gas canister inside your stove pot to save space.
After the stove comes all your food. Keep your food in a dry bag, so nothing is floating around. This will also help when it’s time to eat, with everything is in one container. If you decided to hang your food, you’ll already have a bag to hang it in.
To finish the main compartment off stuff a jacket or coat on top. If I’m expecting rain, I’ll also put my coat in a waterproof bag, but it’s not necessary if hiking in dry climates. Now you’re done with the main compartment.
Top Compartment
In this area, you want to keep quick access to essentials. Keep your medical kit, knife, whistle, map, or any other navigational device. I also like to keep my beanie in here because I take it on and off frequently.
For a few other pieces of gear, like the rain cover for the backpack, you can keep in an outside shovel pocket. For a water bottle, one of the side pockets is perfect. Preferably everything will fit inside. I don’t like to keep too many things on the outside of the pack. Something swinging while walking on the trail can fall off, or be annoying.
Avoid Over Packing
Overpacking is easy to do if you have the room. This is one of the beautiful things about smaller packs; they don’t have the room for all the luxury items. If your pack is larger like a multi-day pack, spread everything out on the floor you want on your trek.
Move all the essential items to one side. These are genuinely essential, not the luxury gear that would be nice to have. Look at the equipment that’s not needed but nice to have and really think: “Will I need this?”. If items can play double duty like using your pot to eat out of instead of an extra bowl, all the better. If there’s still extra space in your backpack after all the essentials, then add some non-essentials.
The next tip is to cut down pack weight. The same day you get back from a hiking trip, spread all your gear on the floor. Decided what you really needed and what you never used. I use to bring extra gear then I realized I never used it with this method.
Organization Inside a Hiking Backpack
Compression sacks, stuff sacks, and dry bags are a great way of staying organized and keep moisture out of your gear. A series of colored sacks of different sizes can save you the trouble of searching for that one thing you’re looking for. If all your gear is inside one large bag or floating around in the main compartment things tend to get lost.
Compression Sacks
A compression sack is a must-have for your sleeping bag on the trail. While you should never store a sleeping bag long term inside a compression sack, they will cut down on a large amount of limited space inside your pack.
This goes for any sleeping bag, regardless of fill. Compression bags are also great for cinching clothes when you’re hiking in colder weather.
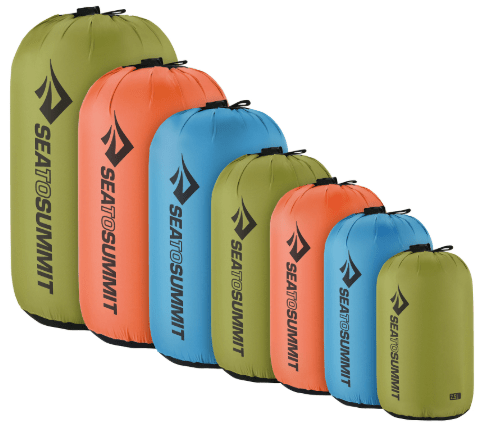
Stuff Sacks
Stuff sacks are a convenient way of organizing smaller items in your bag. I typically carry three in my backpack. These three little bags are different colors, so I can quickly determine which items are in separate bags.
While they’re not waterproof, they have a drawstring for quick access. What’s nice about stuff sacks is that they’re typically cheaper than dry bags and lighter too. The trade-off is that they’re not as robust.
Ultralight Stuff Sacks
Every ounce comes at a premium out on the trail, so shaving a few ounces helps. Stuff sacks are on the lighter side of the gear you’ll be carrying, but everything can be lighter. Osprey and Sea to Summit make premium gear all around, but their stuff sacks are on another level. You can see all their features on Amazon here.
Waterproof Dry Bags
This is a waterproof sack that has a roll-top enclosure. They are essential for the outdoor enthusiast. In summary, the advantage of the roll-top dry bag is they are completely waterproof and durable in extreme weather. The top isn’t going to snag, break or blow out like a zipper or zip-top bag.
They are typically measured in liters, just like backpacks. Sometimes the size is displayed on the outside of the bag, but every manufacturer should have a wide range of sizes and colors available. From 1 liter up to 30 liters with a shoulder strap is a good range for dry bags before the need for a full-on waterproof backpack or duffel bag.
Anything 30 liters or larger a backpack or duffel bag is more appropriate. They do make 100-liter dry bags, but those are more at home on top of an SUV than on your shoulder.
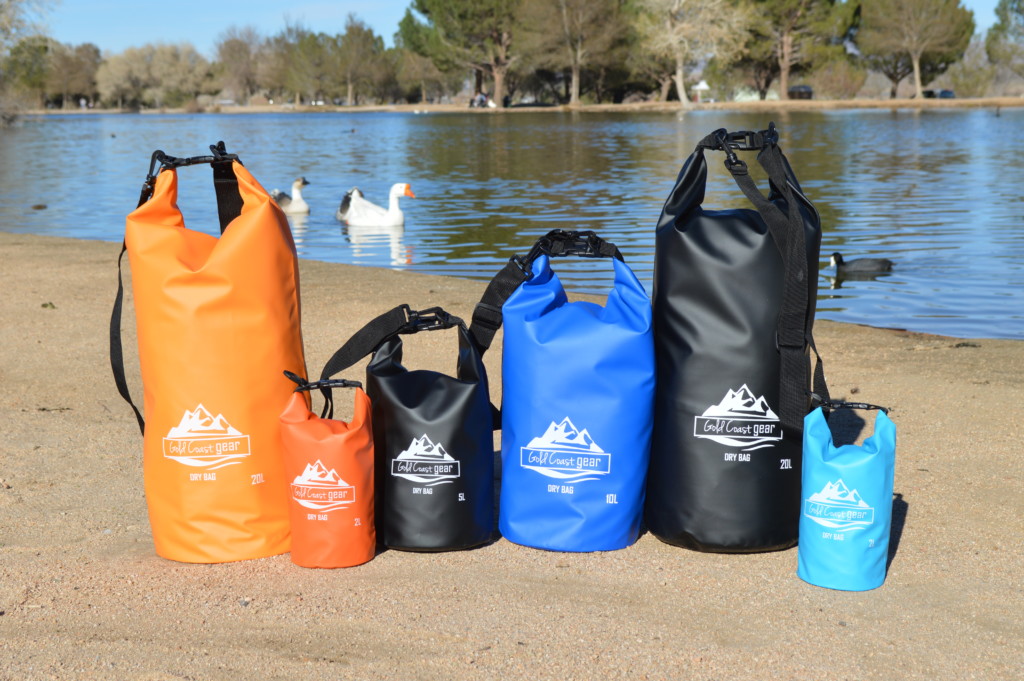
These are the dry bags I use on Amazon; they come in every color and size at a reasonable price.
Rent a Hiking Backpack Online
If you’re the kind of person that wants to try out a few packs before committing to one long term, renting might be for you. Renting also gives an excellent opportunity to try other mountaineering gear that you’re thinking of buying.
Receive the gear by mail, use it and just send it back without even cleaning it (they actually told me to not clean the gear before returning it). Tents, hiking backpacks, stoves, or anything else you would ever need, can be rented.
How to Clean and Maintain a Hiking Backpack
If zippers start to get gummed up or the overall appearance of your backpack looks like it needs to be cleaned, it might be time. Maybe this can be a winter project one day or before storing all your camping gear during the cold months.
You’re going to need some soap like Nikwax tech wash, a sponge, an old toothbrush. Also, a large tub that will fit your pack or just use your bathtub. Nikwax is the standard for washing synthetic hiking gear and can be found on Amazon for a few bucks.
- Start by removing everything out of the pack. Unzip all the compartments. Flip upside down to remove all the dirt and small rocks; give the bag a good shake.
- If your bag has removable shoulder straps, hip belt, or frame, go ahead and remove those too.
- Put your backpack in the tub with warm water. Use your sponge to wipe out the interior; if it’s not that dirty, skip the soap, and just let it soak.
- Use the sponge with soap to clean the dirty spots. Most likely the bottom, sides, and mustard spot from lunch. Most packs have protective coatings, so it’s best not to scrub too hard.
- Clean the zippers thoroughly with the toothbrush and a little soap. Dirt builds up over time and can wear down the zippers.
Once you’re satisfied with the cleaning, rinse the pack with fresh water and hang out to dry. Avoid hanging the backpack directly in the sun. Never use heat or put it in the dryer; this will damage the fabric. Make sure the backpack is completely dry before storing it, so mold doesn’t build up.
FAQ – Hiking Backpack Guide
What Is a Good Hiking Backpack?
You first need to decide on the size; this will be determined by how long and where you’ll be hiking. Generally, I’d recommend the Osprey Atmos AG 65 as an excellent choice for multi-day hikes that will fit most needs.
How Much Does a Hiking Backpack Cost?
A cheap day hike pack can be as little as $30. As quality and size go up, hiking backpacks will range from $150-$400.
Who Makes the Best Backpacks for Hiking?
“Osprey and Gregory packs are known for the best multi-day hiking backpacks. Hyperlite Mountain Gear is known for the best ultralight packs. It comes down to personal preference.
What Size Pack Do I Need for a 5-Day Hike?
Around 60L backpack. Anything less than this and some sacrifices will have to be made.