
Let’s say you just got your hiking backpack, and you’re excited to fill it up and hit the trail. Except, there seems to be a handful of random straps and attachments that you just don’t quite know what to do with.
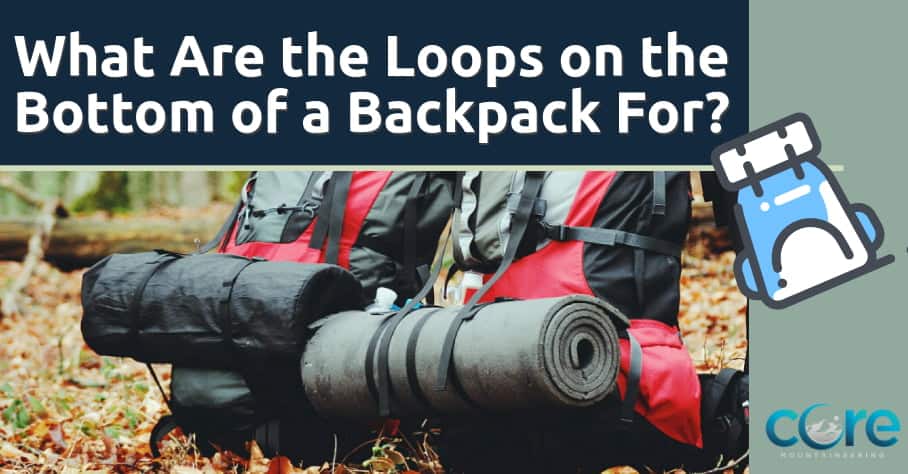
Especially those loops hanging off the bottom—you know, the two loops on either side of the pack.
Well, you’re not alone. I had this same question and many more. Turns out, the loops at the bottom of your backpack are meant to hold trekking poles or an ice axe if you’re into extreme weather hiking.
More on that later.
First, let’s focus on the poles. Trekking poles, also called hiking poles, help you navigate rough terrain or just keep to a good rhythm when going on long treks, thus the name. If you can picture a skier, then the poles don’t look that different.
Like skiing poles, trekking poles come in pairs. The purpose of the loop is to hold the poles secure so that you don’t have to carry them when not using them.
There’s more to know about trekking poles and why they are helpful. I go over several reasons below, as well as some information about the other seemingly random attachments on your pack.
How to Attach Trekking Poles to a Backpack
Trekking poles come in handy for long hikes, choppy and/or steep terrain, and to balance out your weight when your backpack is heavy.
The last point is the most important. When you’ve stuffed your backpack to the rim, it can be very heavy, and that is bad for both your back muscles and your center of gravity. Walking with trekking poles helps push your weight forward and ease the pressure off your back.
Another great use? Checking out uncertain terrain. Let’s say you come to a stream and want to know how deep it is—a perfect opportunity to stick your pole in and gauge. Same with muddy or overly soft ground.
There’s also a safety element. If you need to defend yourself against any aggressive wildlife, then the poles have sharp edge points and work as a defense stick. If you’re doing any amount of outdoor exploring, trekking poles are a great accessory to have on hand.
Be sure to check out our guide on how to fit a backpack properly.

Trekking Poles vs. A Hiking Stick
| Feature | Trekking Poles | Hiking Stick |
|---|---|---|
| Stability | High | Low |
| Shock Absorption | High | Low |
| Weight | Lightweight | Varies |
| Durability | High | Varies |
| Ease of Use | Moderate | High |
| Price | High | Low |
| Terrain | Varied | Limited |
| Upper Body Workout | Yes | No |
| Portability | Compact | Bulky |
Some hikers prefer to take a single hiking stick. I remember when I was younger, the first thing I would do on a hike was to find a giant piece of wood to be my walking stick for the day. This can help with many of the above points, except it doesn’t offer symmetry.
I find that when hiking with a single stick, I have one arm tired out, and then I need to switch arms. Having two poles allows you to work out both arms and keep both hands raised to help with blood flow. Another point: a hiking stick is best when you have very easy terrain and need little support. Otherwise, go with poles.
What Type of Trekking Pole is Best
There are different types of trekking poles available. Here is what you want to look for:
- Grips: The best grips are foam or cork, as they are softer on the hands when you grip tightly for long periods. Rubber grips aren’t as comfortable, but they do provide more insulation in colder weather.
- Weight: Go for as lightweight as possible. Aluminum poles will withstand pressure and are easy to carry. Composite poles (from carbon) are light but they might shatter under pressure.
- Height: Make sure your poles are high enough so that your arms are at 90 degrees. Many poles are adjustable, but if not, you need to measure the distance from the ground to your extended arm to find the right size. However, what’s great about adjustable poles is that you can lower them when you need more leverage to hoist yourself up steep sections of your trail.
- Shock Absorbers: Not necessary, but can help reduce the impact of hard ground on your hands and arms.
- Steel Tips: These are best for penetrating the ground and doubling for defense.
- Wrist straps: Straps provide added support, but please read the manual for how to use them correctly.
You can find some good aluminum adjustable trekking poles here.
Ice Axes on your Hiking Backpack
This bears mentioning because, unlike me, there might be hikers that dream of traversing snowy climes. An ice axe is a mountaineering tool used for safety, reserved for those with experience dealing with harsh landscapes.
If you’re ascending an icy slope, for example, the axe gives added security, so you have balance and a stopper from sliding or falling. Those loops are good for this tool, also.
Purposes For Those Other Attachments
Most hiking backpacks come with a variety of straps and other attachments. These are to help you take everything you might need, whether on a short hike or a long multi-day trek.
After all, not everything has to fit inside your pack. If it did, the pack might extend down to your knees. Important note: Not all backpacks have the same attachments!
This is why you need to research any hiking backpack before you purchase it and think about what you will want to carry with you when in use. You can find our guide to hiking backpacks here.
Here are some of the purposes for the most common appendages:
- Hip Belts: These are like shoulder straps, but instead, they wrap around your stomach to alleviate pressure on your back and engage your core muscles to help carry the weight of your pack. Very useful to have. Check out this Diamond Candy backpack on Amazon.
- Shoulder Strap Clips: These are great to have, as you can use a carabiner or clip to hook small valuables like a camera case or phone pouch. Look for packs that have small clips along with the straps that go over your shoulders, like the D-shape hook on this one.
- Outer Pockets: Think beyond the mesh outer pocket—those tend to be flimsy and stretch out over time, not keeping your items secure. More sturdy backpacks have sturdy pockets intended to hold gear, like shovels or snowshoes, that need a rugged material that won’t rip easily.
- Side Compression Straps: These are basic straps, usually placed near the top and mid-bottom of the pack, meant to strap around your body to help alleviate pressure from a heavy backpack. However, if they are reversible, some hikers use these straps to attach their sleeping bags or small tent bags to the back of the pack.
- Rear Straps: Some backpacks have straps at the very bottom. These are meant to hold your sleeping pad rolled up so it sits below the pack when on your back. If not, you can buy accessory straps that can attach to your backpack, like these straps on Amazon.
- Daisy Chains: These are strips along the sides of the pack where you can clip on items, similar to the shoulder strap clips, but because these are on the back, they are meant for heavier items that don’t need to be as accessible.
What Is a Good Hiking Backpack That Has Loops
Glad you asked. Many hiking backpacks come with these bottom loops, and even more packs come in all shapes and sizes. When on Amazon, look for packs like Osprey, in both Men’s and Women’s styles.
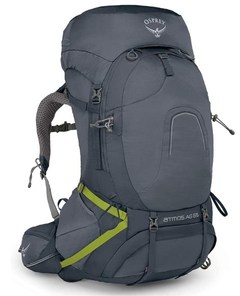
You can find the current price of this Osprey backpack here.
Proper Use and Maintenance of Backpack Loops
- Mind the weight: When using backpack loops, consider the importance of the gear you attach to them. Overloading loops can put too much strain on them, causing them to tear or detach from the backpack. Be mindful of the weight and size of the items you attach to the loops, and consider alternative ways to carry heavier or bulkier gear.
- Protect the loops: Backpack loops can accumulate dirt, moisture, and other debris that can weaken them over time. To maintain the durability of the loops, protect them from external factors such as weather or abrasive surfaces. For instance, use a rain cover or wrap the loops in a protective sleeve to prevent them from getting wet or scratched.
- Use the correct attachments: Backpack loops can accommodate a variety of attachments, such as carabiners, straps, or cords. Make sure to use the right attachments for the job, and check that they are properly secured to the loops. Using the wrong attachments or attaching them improperly can cause the loops to fail or break.
- Clean and maintain regularly: Like any other part of your backpack, the loops require regular maintenance to keep them in good shape. Clean them regularly with a soft brush or cloth, and avoid using harsh chemicals or abrasive cleaners that could damage the loops. Inspect the loops for signs of wear or tear, and replace any damaged loops as soon as possible.
- Learn the limits: Finally, it’s important to understand the limits of your backpack loops. While they can be versatile and convenient, they are not designed to carry excessively heavy or bulky items. Make sure to use the loops within their intended capacity, and consider alternative methods for carrying gear that may be too heavy or awkward for the loops.
Wrapping Up What Are the Loops on the Bottom of My Backpack For
After exploring the various loops on the bottom of backpacks, it’s clear that these features can serve multiple purposes depending on the backpack’s design. Whether you’re planning a camping trip or a snowboarding excursion, these loops can come in handy for carrying extra gear, attaching trekking poles or ice axes, or securing other types of equipment.
By taking advantage of the versatility of these loops, you can make the most of your backpack and optimize your packing strategy for your next adventure. It’s important to remember to use the loops properly and maintain them appropriately to ensure their durability and effectiveness over time. With a bit of creativity and resourcefulness, you can turn these loops into valuable assets for your outdoor pursuits.
If you’d like to keep all your gear clean and dry, then check out our guide on Waterproof Dry Bags.