
To keep your stove and cookware performing like new, they need periodic maintenance and cleaning. Cleaning can also prevent your stove from malfunctioning or destroying the finish on cookware. With a clean camping stove, you’ll get a better flame and be more fuel-efficient.
The basics of cleaning a backpacking stove are wiping down the outside after a camping trip. The exterior can be cleaned with soap and warm water. For the inside, remove the grate for cleaning and wipe down the inside of the stove with a clean cloth.
Cookware can soak inside a sink or bucket in hot water along with soap. The longer pans and pots soak, the less scrubbing is needed.
Different cooking surfaces have separate care and handling needs. You’ll need to use the right application to prevent damage. Let’s get into more specific types of stoves and cookware material.
Cleaning Stoves
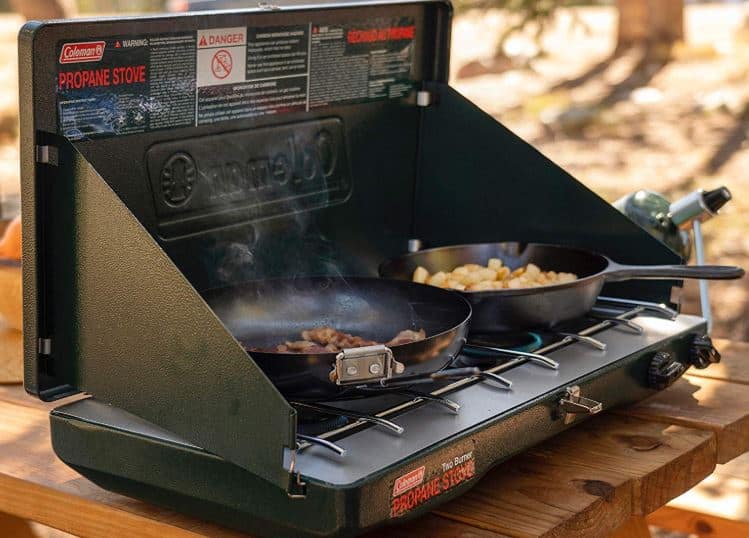
Let’s start with one of the most used camping stoves. These Coleman propane stoves can be found almost everywhere. While they are bulky, they offer two large cooking surfaces, easy to repair, and built strong.
Coleman Propane Stove
Annually cleaning is recommended before storing for off-season camping. In most cases, just like all stoves, they can be wiped down clean with soap and water. Coleman themselves recommends ordinary dish soap. For a deep clean, take these steps.
- Boil-Over Spills – This is when your pot boiled over the top, and now there is grease and fat on top of and below the burners. Remove the screw(s) on the burner ring and lift the manifold off. Throughout the years, there have been model changes, but you should be able to find the screws. Clean the manifold and case with water and soap. Do not use and harsh cleaners because they can peel the paint off the case. Soak as long as needed.
- Storage – Let all the parts to the stove completely dry before reassembly. This is important to prevent rust inside the fuel tube, disturbing the flow. For long-term storage, use a large plastic bag. This will prevent small insects from getting inside, clogging up the fuel, or airlines.
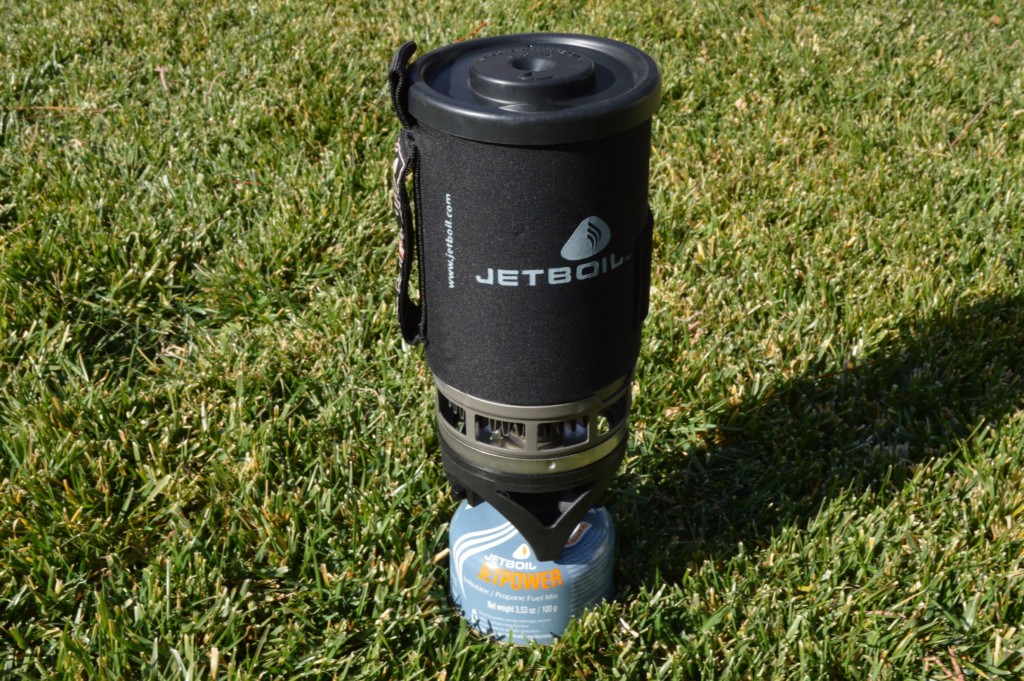
Jetboil Stove
These stoves are fantastic, and I’ve relied on mine for years. They are very low maintenance, which is one of the best things about them. When cleaning the stove part itself, avoid any chemicals that can damage the plastic feet or fuel knob.
- Jetboil Pot – Wipe down the inside of the cup with a cloth. Use a 75/25 solution of water and white vinegar inside and boil for three minutes. Scrub with a blue dish sponge but don’t use anything metallic because this will damage the nonstick coating. Baking soda can also be used but stay away from powdered detergent as it will damage the surface as well.
- Rust in Jetboil Pot – This happened to me as well. I stored my fuel canister inside the cooking cup, and rust developed. This won’t affect the performance of the stove. To clean, use a blue Scotch Brite sponge with baking soda and water. To avoid rust in the future, store the fuel canister upside down inside the pot. Make sure to put the plastic fuel cap on the fuel canister, so the cooking pot doesn’t get further damaged.
Gas One GS-3000 Camping Stove
The Gas One GS-3000 has taken off in popularity due to its low cost and lightweight. It’s not mainly the best stove, but at around $20, it’s hard to beat.
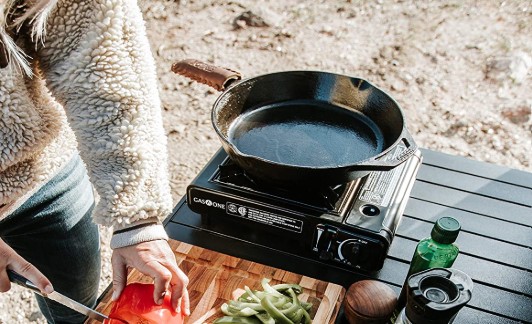
- Boil-Over & Splashes – The Gas One is easy to clean when an unexpected spillover happens. The manifold drip pan can be taken off with no tools. The drip pan is dishwasher safe and can be scrubbed.
This is one of the best stoves for the money at around $20 on Amazon. It also comes with a carrying case for travel or storage. See what the current price is on Amazon here.
Wood Camping Stove
These don’t have any electrical parts or small fuel tubes, so cleaning will be straightforward. That’s good because they can build up a lot of black soot over time.

- Light Cleaning – disassemble the wood stove and soak in warm water with dish soap for an hour or two. Scrub the surface with a green Scotch-Brite pad. This will leave small swirl marks but won’t damage the stove.
- Self-Cleaning Oven – Put the stove on the top rack with a piece of aluminum foil on the bottom to catch any ash. Set the oven on a clean cycle (2 hours). You’ll get some smoke and odors for about 20 minutes. Once the clean cycle finishes let the stove cool completely.
When you look around for a wood camping stove, you’ll find a lot of options. I have a few of them in different shape configurations, but overall I’d recommend the Tomshoo wood burning stove. It’s stainless steel and reasonably priced. Check out the current price on Amazon here.
Cleaning Cookware
There are quite a few camping and backpacking cookware options. They are made of different materials and surfaces that need special care.
The black carbon soot on the bottom of your cookware is an insulator. This soot creates a barrier between the heat source and the pan. This barrier diminishes the performance, causing more fuel use, and longer cook times. It’s essential to remove this layer for overall cookware efficiency.
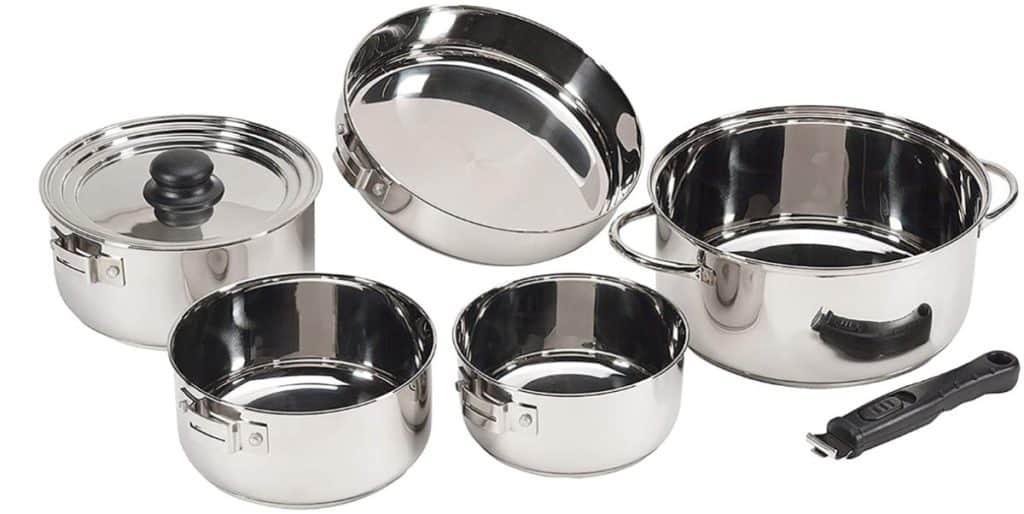
Stainless Steel Cookware
If weight isn’t a concern, then stainless steel is the way to go, especially for group or family camping. Your stainless cookware will last for years and look good doing it.
- Light Cleaning – For inside the pan or pot itself, apply medium heat. Add a small mound of baking soda and about a cup of water. As the mixture boils up on the side of the pan, the grease and fats will cling to the backing soda. Give it some time to boil, but don’t let the water completely evaporate. After ten minutes, remove from heat. This will allow you to scrub what’s left easily. Use a green Scotch-Brite pad for scrubbing.
- Deep Cleaning – For the top and bottom. Fill a large pot with enough water to cover the dirty pan completely. Add baking soda and boil the kettle for ten minutes. Scrub with a Scotch-Brite pad while the pan is still warm. You’ll get some light scratches on the pan, but it won’t damage it.
- Self-Cleaning Oven – Put your stainless steel cookware (assuming it doesn’t have a plastic handle) on the top rack with a piece of aluminum foil on the bottom to catch any ash. Set the over on a clean cycle (2 hours). You’ll get some smoke and odors for about 20 minutes. After the clean cycle, let the cookware cool completely.
There are not as many options for an excellent stainless steel camping set as aluminum sets. Stansport makes one of the best sets with a few different options. See the full set and price on Amazon here.
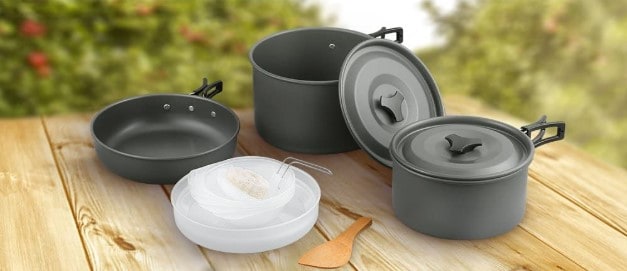
Aluminum Camping Cookware
I use aluminum cookware most of the time for backpacking. I like that it’s lightweight and a full set is much cheaper than stainless or titanium cookware. Since these pans and pots are nonstick, they should be easy to clean for the most part. However, I have had some significant build-up from burning fish at a campsite.
- Dishwasher – Avoid the dishwasher. Nonstick pans should be hand cleaned only. Dishwashers damage the coating, making it thin and possibly flake off.
- Handwash – Never use any metallic cooking utensils as it will damage the coating. Same with scrubbing the pan clean. Use a Blue Scotch-Brite pad instead of the green one. The blue pad is made for nonstick cookware.
There quite a few companies that sell aluminum backpacking cookware. I went with Terra Hiker’s full set cookware. I’ve used this set, and it performs well at a great price. See the current price on Amazon here.
Care Tips for Nonstick Cookware
Nonstick cookware is excellent, but it won’t last as long as other surfaces. You can get the most life out of them by following these tips:
- When storing pans and pots in a stacking kit, put a paper towel between the tops and bottom. This will prevent the bottom surface from scratching the coating on the lower pan.
- Don’t use Pam or other nonstick cooking sprays. These leave a thin coat that is difficult to come off even with regular cleaning. Pam makes a nonstick pan into an always stick pan.
- Avoid high heat. Use the pans for lower temperature cooking, like fish or eggs. Use a cast-iron pan for steering steak.
- Don’t use metal utensils. Use silicone, plastic, or wood.
Cast Iron Skillet
Cast iron pans are great while car camping or walking a short distance. They are thick, almost maintenance-free, and will last a lifetime.
The best way to care for a cast-iron skillet is to use it often. A build-up of oil will prevent rusting. Make sure to dry the skillet entirely before storage to prevent rust. If needed, put it in the oven for ten minutes to dry completely.
- Light Cleaning – For routine maintenance, light cleaning will be fine. After it cools but still warm, run some soap and water over the surface. Avoid using a metal scrubber because it can remove the layer of carbonized oil (seasoning). Use a regular dish sponge and avoid scrubbing too hard.
- Salt Method – For a more substantial cleaning, add some salt to the skillet. Scrub the surface until it’s clean. With this method, the seasoning will still stay on.
- Removing Rust Spots – Moisten your green Scotch-Brite pad with some water and work the rusted area.
- Storage – Before putting the skillet away after cleaning, make sure it’s completely dry. Rub the skillet down with a small amount of fat/oil. Coconut oil, vegetable oil, Crisco, or whatever you prefer. Use a small amount, about a nickel-size amount of coconut oil works. Rub the oil all over the inside, under the skillet, and the handle. Use a dry paper towel and give it another rub down.
If you want a new cast iron skillet that’s already seasoned, look at the Amazon-branded one. It comes seasoned, so after a raise (don’t wash it), it’s ready to go. See the current price of this cast iron skillet on Amazon here.
How to Season a Cast Iron Skillet
- Wash the skillet with soap and water. Work the rust spots with a green Scotch-Brite pad.
- Raise thoroughly, then dry it with a paper towel or hand towel.
- Give the skillet a good coat of vegetable oil. If you don’t have a pastry brush, a paper towel will work fine. Coat the bottom as well.
- Now you’re ready to bake the skillet upside down. But a layer of aluminum foil on the bottom of your oven.
- Bake the skillet at 375f for an hour. After the hour, let the skillet cool completely.
- Recoat and repeat the baking process three times.
After this seasoning process, the skillet should have a dark shine. Now you’re ready to use your cast-iron skillet.
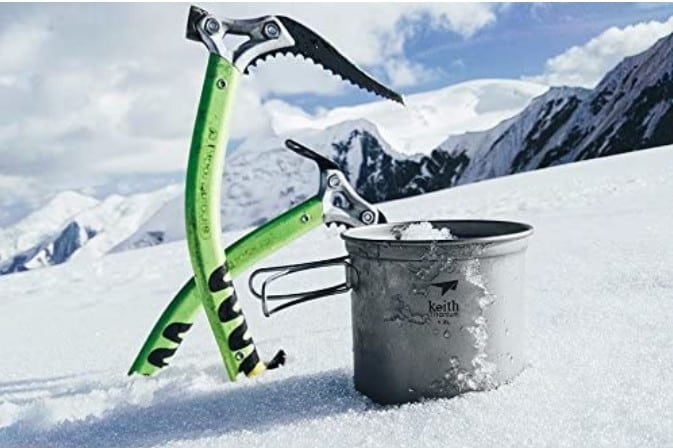
Titanium Camping Cookware
Titanium cookware is excellent for hiking. It’s lightweight, durable, and will last for years. The same size stainless steel pot weights about four times more than a titanium one. That means you can carry a full titanium cookware set at about the same weight as one stainless pan.
Besides weight-saving, there are a few other things to consider when comparing to stainless. Titanium heats up quickly; it only takes a minute to warm up. This is faster than stainless but, titanium isn’t going to have as even heat distribution on the cooking surface as stainless. Overall, stainless is better cookware, but the weight savings of titanium is the deciding factor.
There’s no way around it; the price of a titanium camping cookware set is going to be more expensive than a stainless cookware set. This is the biggest downside but worth it if you need the weight saving.
- Cleaning Titanium Cookware – Titanium is a resilient material but, don’t use any harsh chemicals or cleaners on it. This cookware is expensive, so don’t risk damaging it. Soak the pan with dish soap, then use a soft sponge for scrubbing.
- Deep Cleaning – When food is burnt on the bottom and challenging to remove, boil it in water. Then clean it with liquid dish detergent and use nylon scouring pads. Work the pad to remove the burnt food.
Keith Titanium is well known in the camping world for people that are into titanium cookware. While more expensive than other outdoor cookware, all their gear is high quality. You can see the recommended titanium cookware set on Amazon here.
If you have anything to add, let me know down in the comments. Also, check out my gear recommended page for stoves, dry bags, and other backpacking gear that I’ve tested here.
FAQ – Cleaning Camping Stoves & Cookware
How Do You Get Grease off a Camp Stove?
The basics of cleaning a backpacking stove are wiping down the outside after a camping trip. The exterior can be cleaned with soap and warm water. For the inside, remove the grate for cleaning and wipe down the inside of the stove with a clean cloth.
How Do You Clean a Coleman Stove Burner?
Remove the screw(s) on the burner ring and lift the manifold off. Throughout the years, there have been model changes, but you should be able to find the screws. Clean the manifold and case with water and soap. Do not use and harsh cleaners because they can peel the paint off the case. Soak as long as needed.
How Do I Clean My Jetboil?
Use a 75/25 solution of water and white vinegar inside and boil for three minutes. Scrub with a blue dish sponge but don’t use anything metallic because this will damage the nonstick coating. Baking soda can also be used but stay away from powdered detergent as it will damage the surface as well.
How Do I Clean Titanium Cookware?
When food is burnt on the bottom and challenging to remove, boil it in water. Then clean it with liquid dish detergent and use nylon scouring pads. Work the pad to remove the burnt food.


Is my Jetboil Fluxring fry pan ruined if metal utensils were used and scratched it up?
It depends on how scratched up it is. It’s going to be like any other “non-stick” pan.
No matter how careful my wife and I are, after about five years, we toss out the old non-stick pans because they get too scratched up. I’ve read that the material from those pans is not the greatest if you digest flakes of it.